Quickstart
Flowdash was designed to make it fast and easy to build task management software tailored to your unique business needs. The goal of this tutorial is to give you a quick overview of how Flowdash works. In this example, imagine we’re a company launching a new product soon and have multiple users who requested early access. We’ll create a simple workflow for manually reviewing those users, and automatically send an email to those who are approved.
Getting started
-
Begin by creating an account at flowdash.com
-
Once logged in, let’s create a new workflow from scratch.
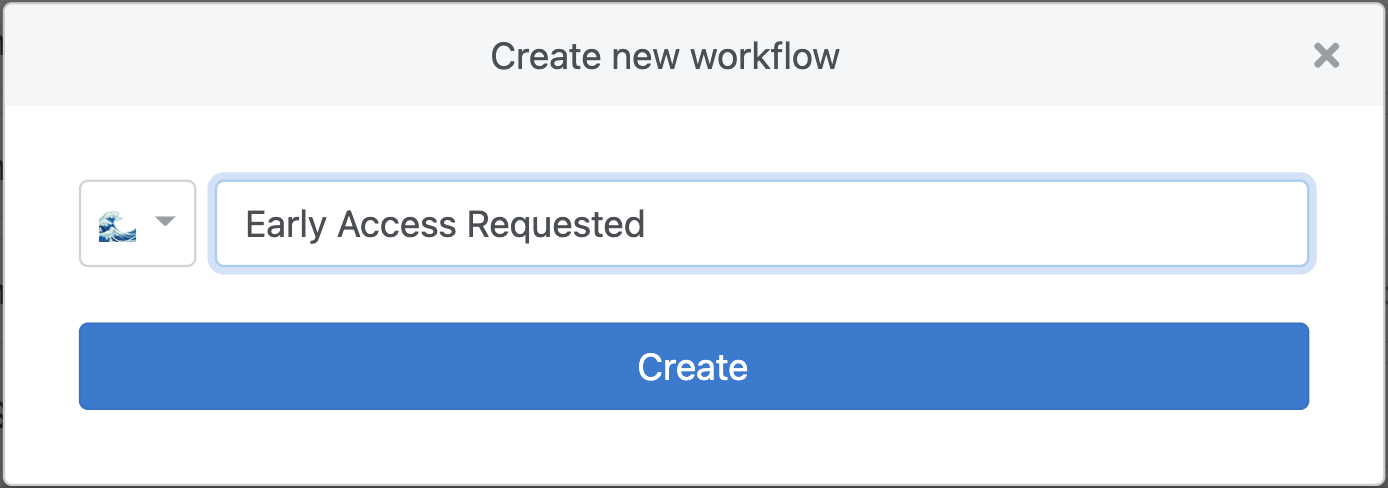
Note
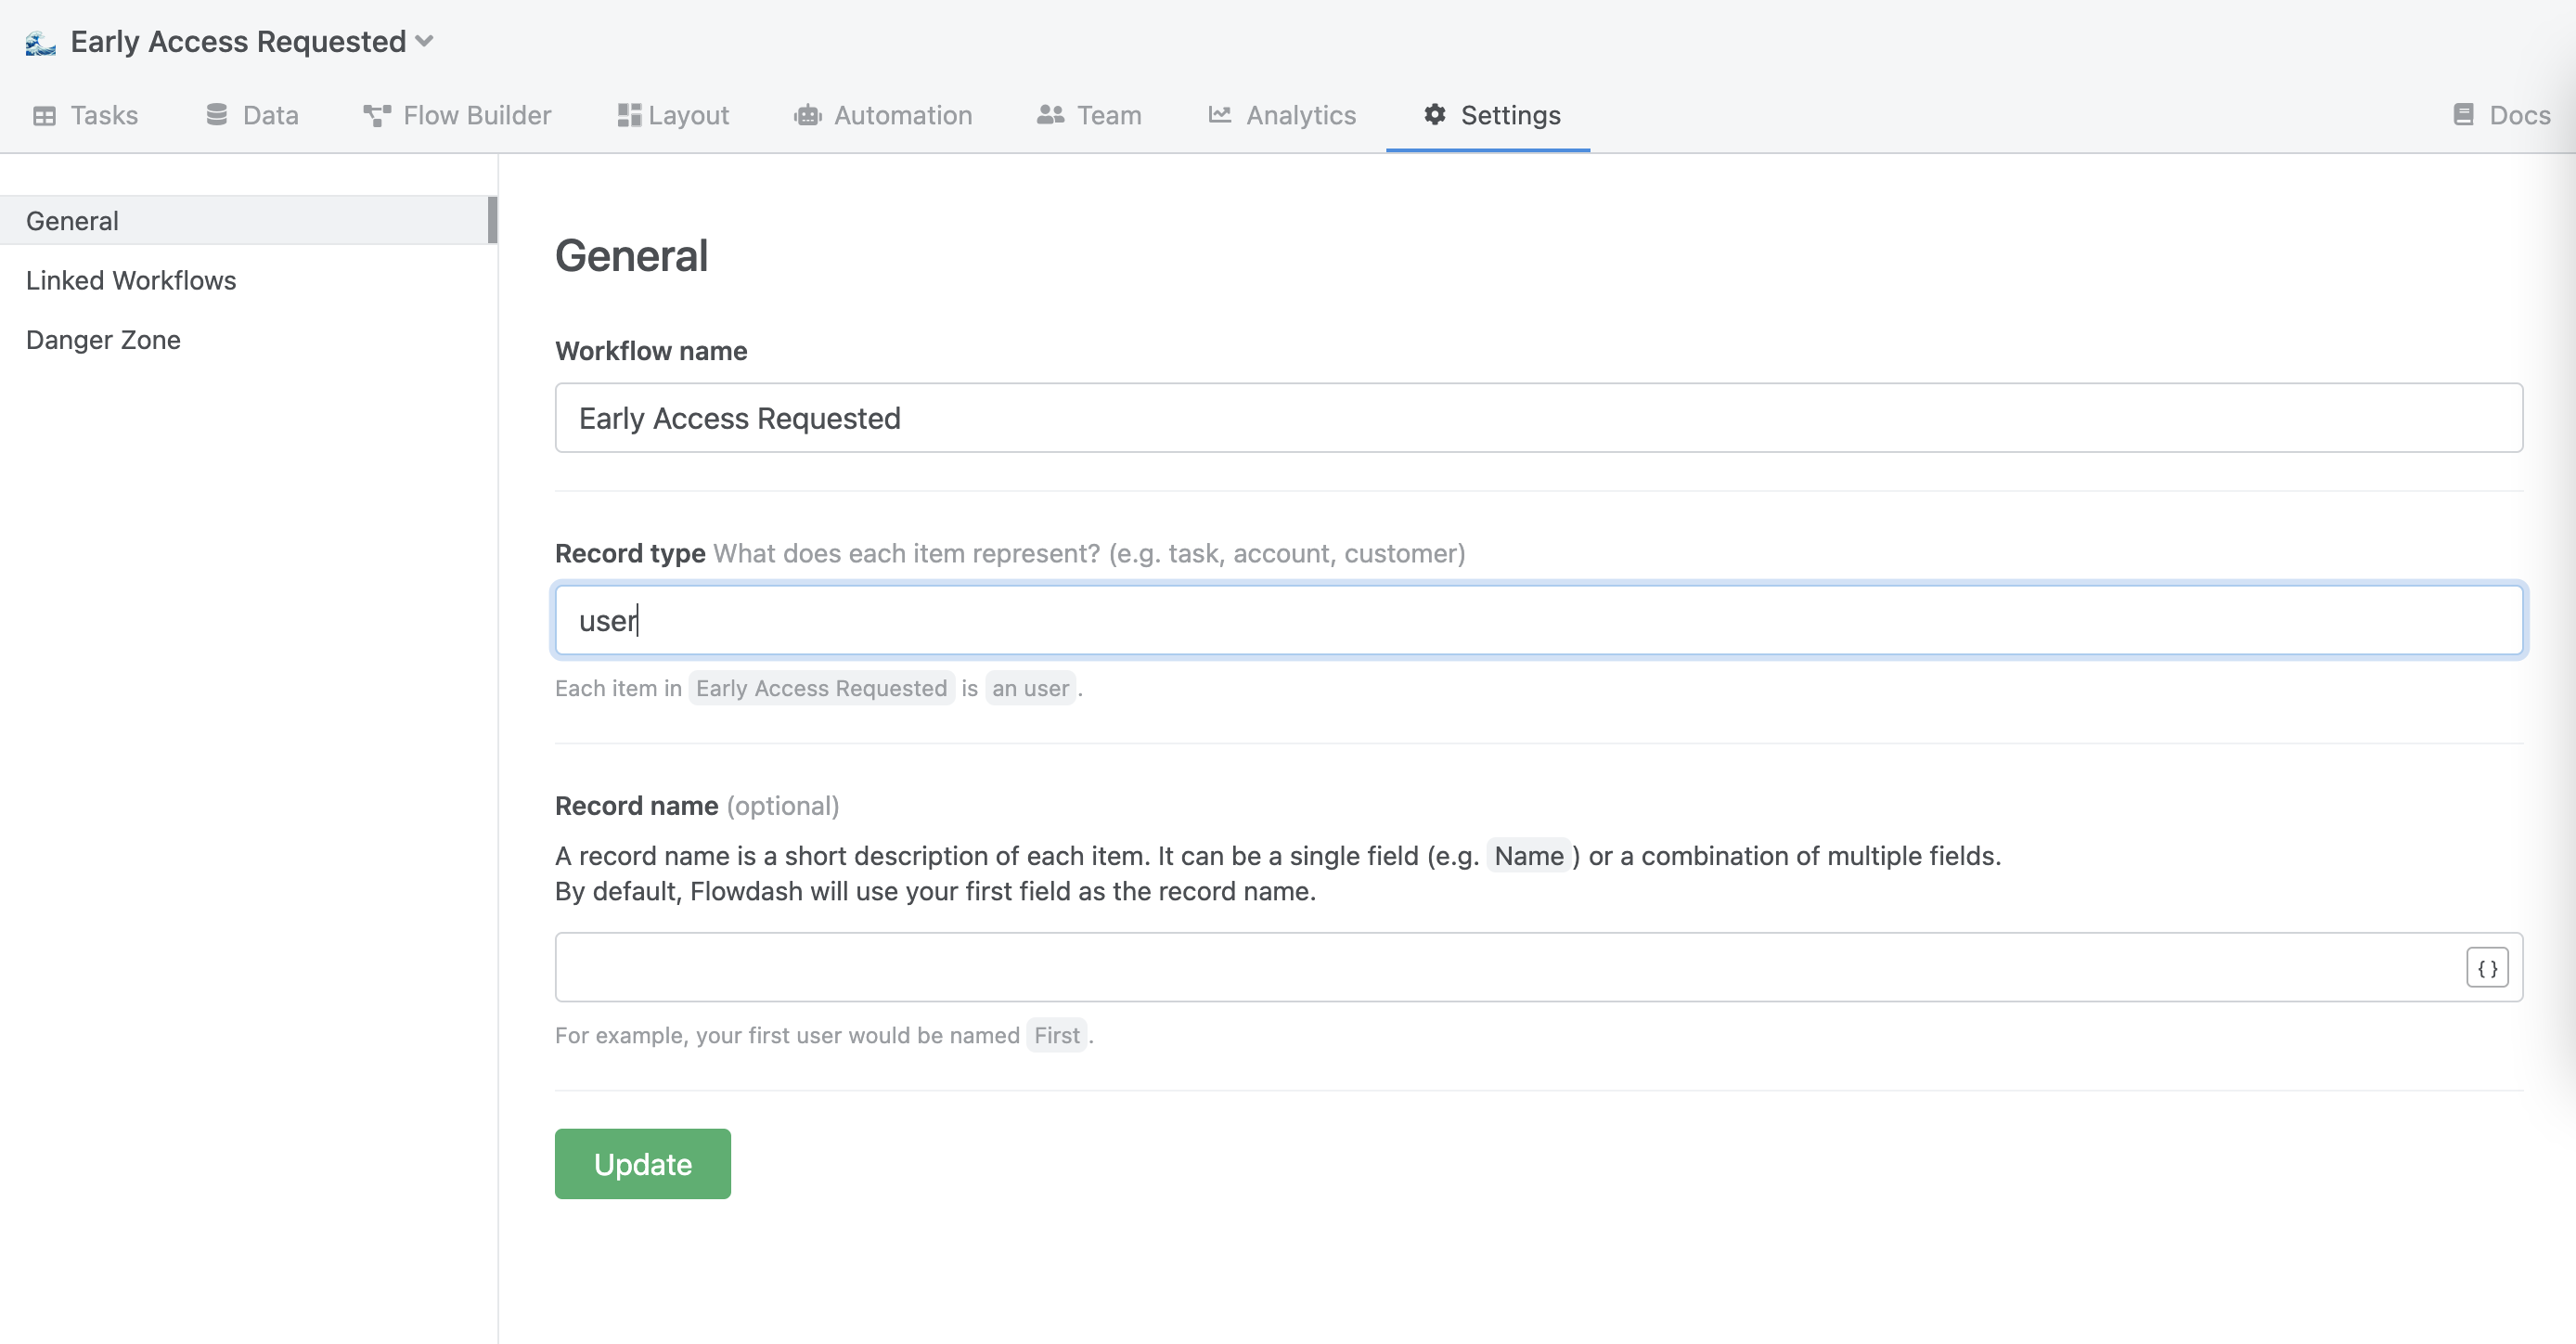
Because this workflow will be tracking a list of users requesting early access, we’ll make the record type user.
Design your data model
If you’ve used a spreadsheet before, this part will feel familiar. You’ll notice that by default, we have a table with few special columns such as Assigned to and Stage. More on that later.
For now, as we’re tracking a list of users, we’ll start by creating additional fields (e.g. columns) to capture the user’s company and email address.
- Create a text field named
Company - Create an email field named
Email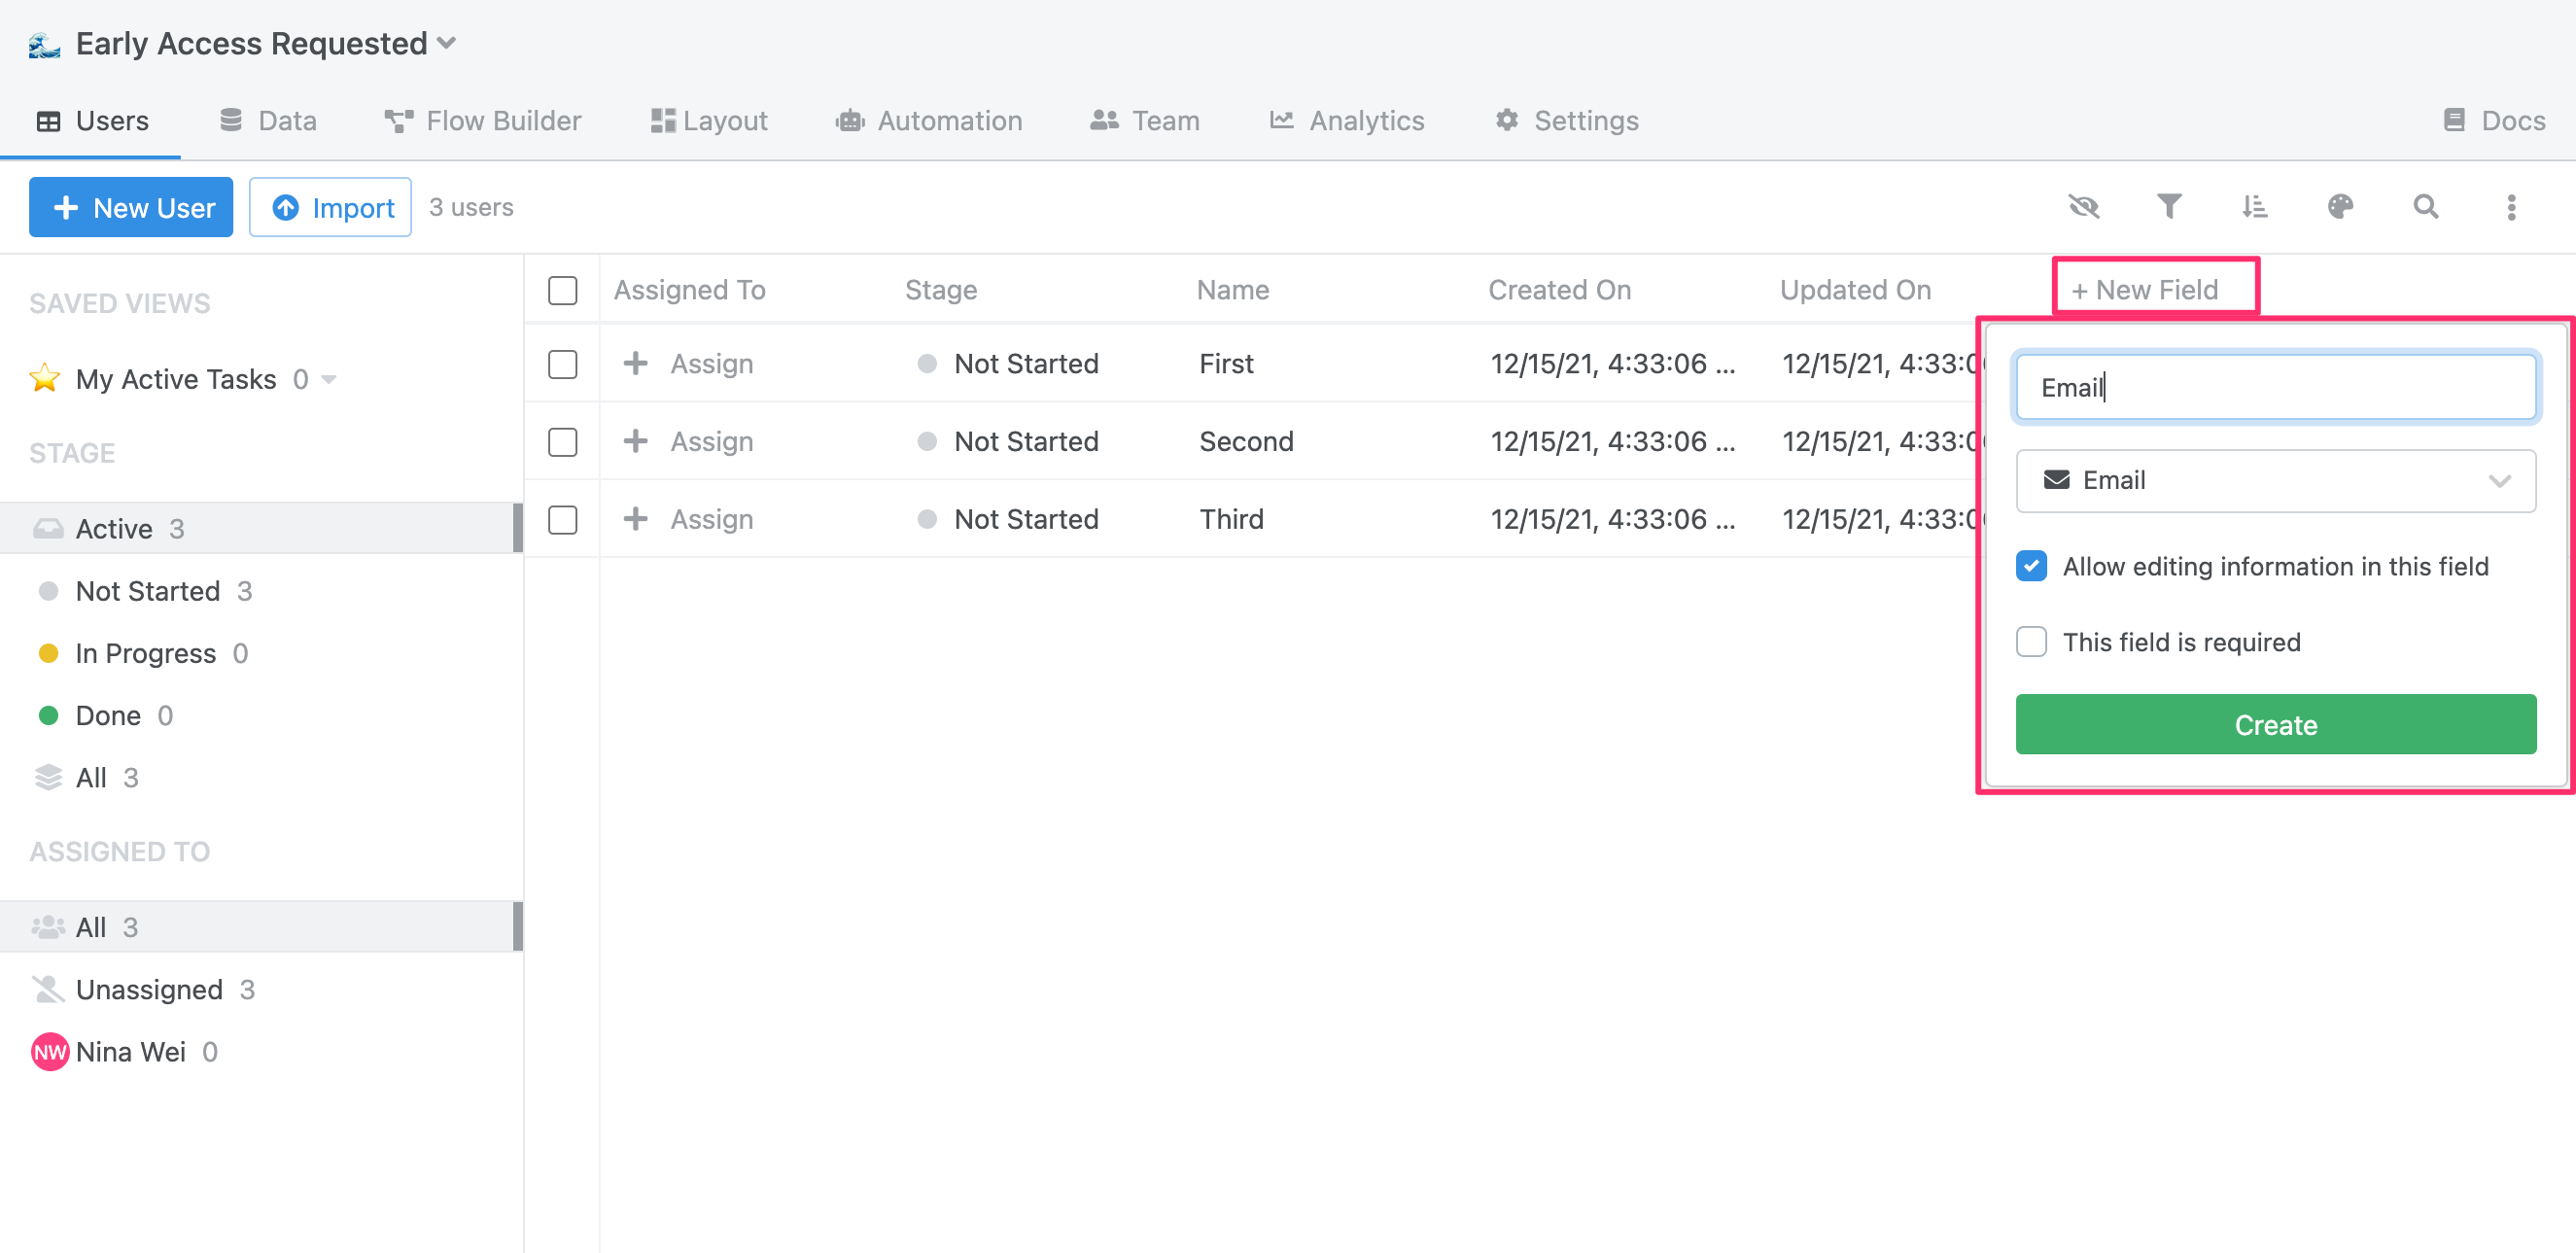
Fields & Data types
Unlike spreadsheets, when creating fields in Flowdash you have to specify a data type. Data types define the type of information that will be saved in the future. Flowdash supports multiple data types such as Text, Email, Date, File attachment, and more.
By defining a type, you’re ensuring your data always remains clean and consistent. In order words, no data-entry mistakes down the line.
Build your workflow
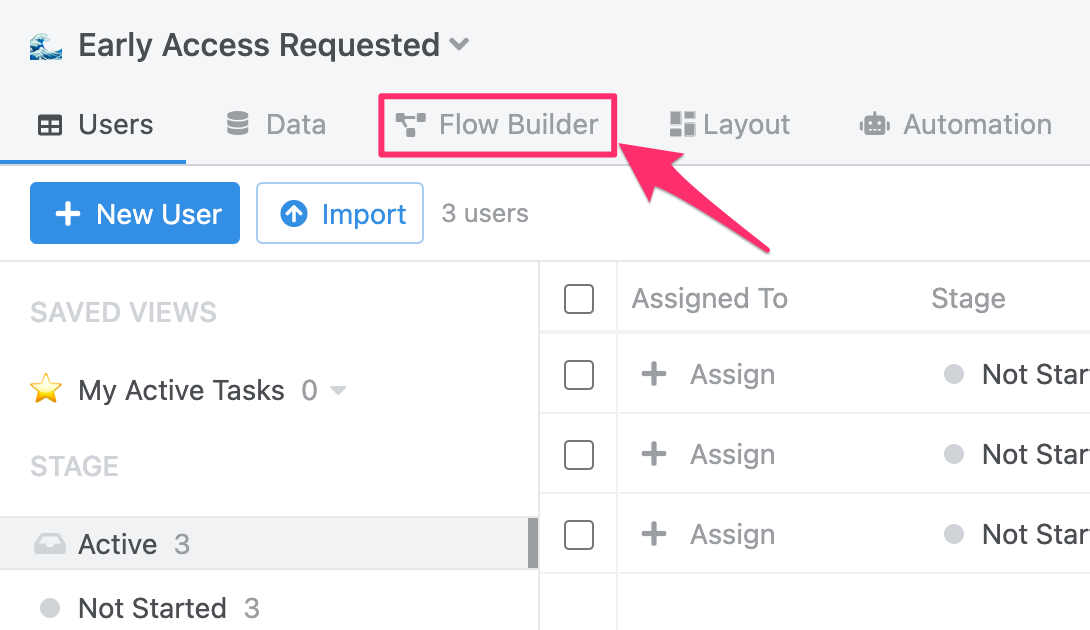
Time to hop to the Flow Builder to create a process for reviewing users who requested early access.
-
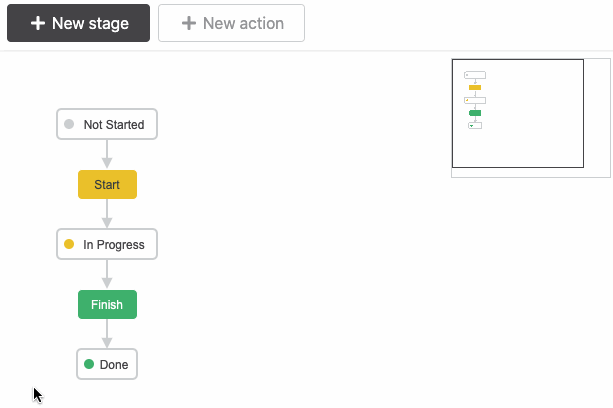
Navigate to the Flow editor by clicking on the diagram icon in the top left shortcut menu.
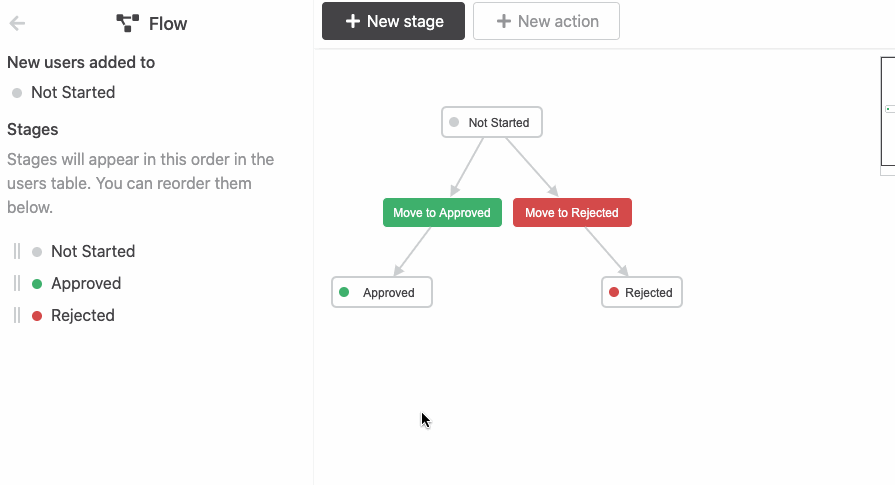
The Flow Builder is a visual editor where you can manage stages and actions. By default, a new workflow contains 3 stages (
Not Started,In Progress, andFinish) and 2 actions (Start, andFinish).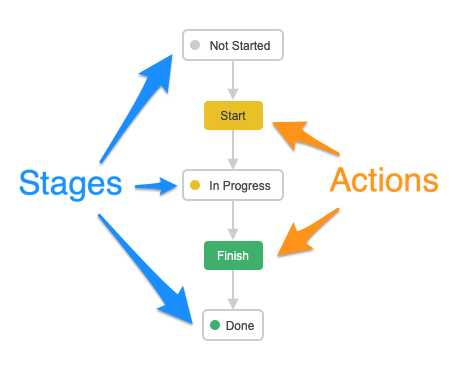
What’s a stage?
Stages indicate the progress of a task throughout the workflow. At any given time, a task will always be within one of the defined stages. You can add as many stages as necessary to map out the various steps of your process.
What’s an action?
Actions are manual decisions that users can take for any given stage. Those actions can transition from one stage to another. In the example above, when a task is
In Progress, we can trigger theFinishaction which will set the stage toDone. -
Let’s start by removing the default stages and actions.
-
Create two new stages:
ApprovedandRejected
-
Create two actions that can be taken from the
Not Startedstage.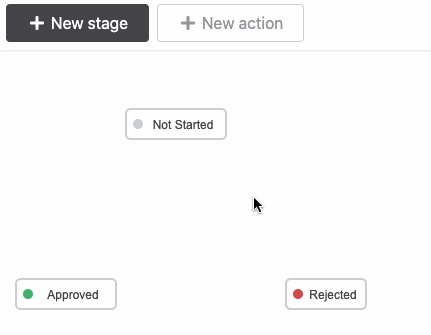
Note
You can automatically create an transition action by connecting two stages in the editor. Keep in mind that the order in which you connect the stages matters!
-
Setup the
Move to Approvedaction to send an email to the user.Beyond stage transitions, actions can also implement business logic through a set of steps. For example, an action can send an email, trigger a slack alert, or automate actions in a 3rd party software.
Customize your email with user data
When creating your email template, you can use user data as variables that will automatically get replaced when triggering the action. To do so, simply use the double bracket notation (e.g.
{{Email}}) -
Setup the
Move to Rejectedaction to send a rejection email. Nothing too harsh, plz :) -
Let’s return to the dashboard view by clicking on the back arrow in the top left of the editor.
Add data to your workflow
- Now that the workflow is ready to use, let’s create a user to review by clicking the
+ New Userbutton.
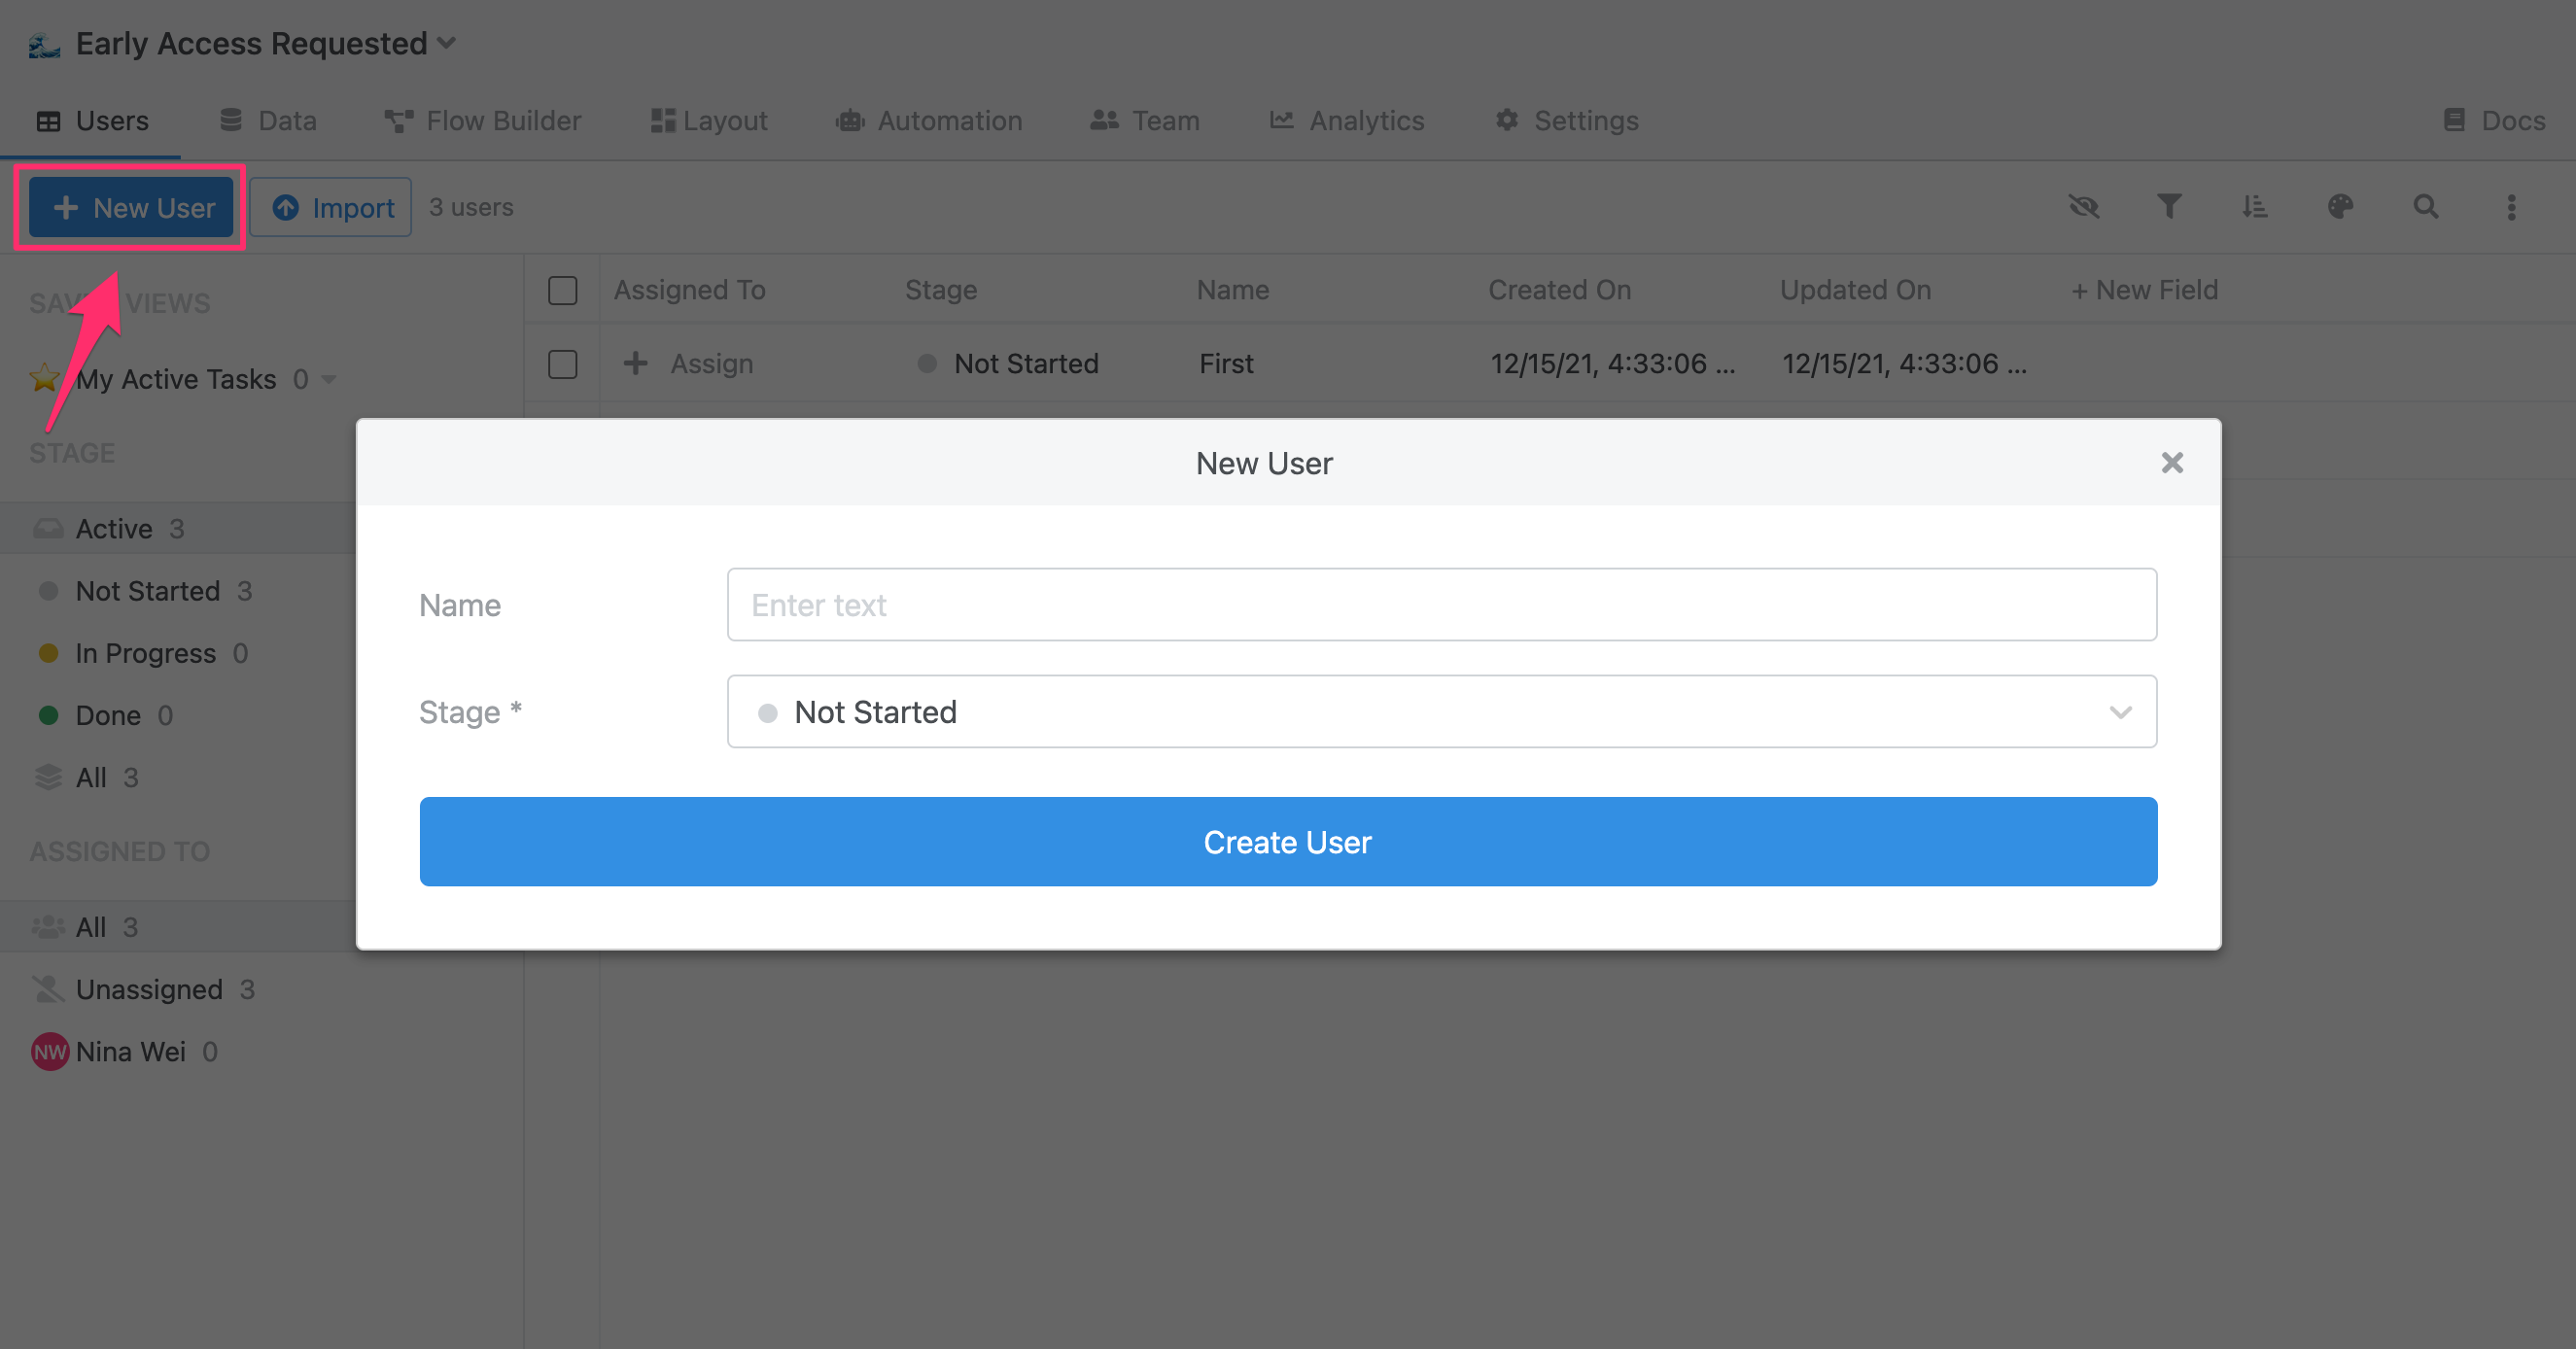
Please use your real email when creating users
Remember, we’ve setup our actions to send emails. As a result, please use your real email address to ensure the emails get delivered, and to avoid spamming a random person.
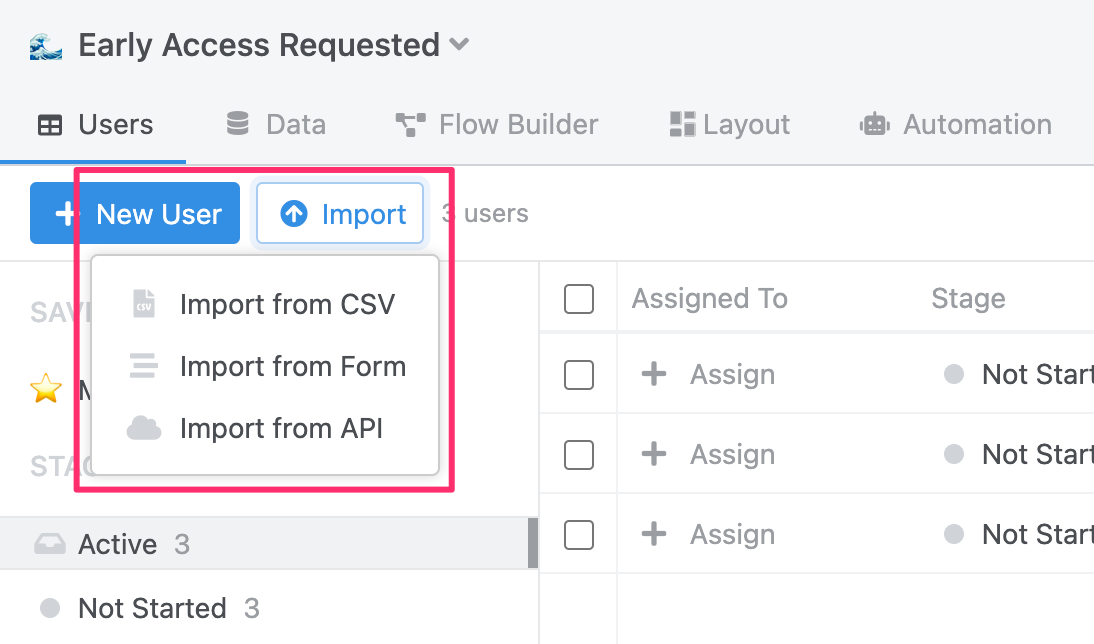
Importing data to Flowdash
In this example, we manually create a new user. However, in practice this isn’t the way people would request early access. That’s why Flowdash supports importing data using a CSV, a fully customizable Web Form, or using an API.
Triggering an action
Great, now that you’ve added a record, we can open up the details page and take an action.
-
Open the new user’s details page by clicking on the latest record in the table view.
-
Take a moment to familiarize yourself with the details page. In particular, notice the user’s current stage (top left) and available actions for that stage (top right). These are the actions we’ve created in the Flow editor!

-
Decision time: Let’s decide to
Move to approvedthis user.You’ll notice that the current stage for this user has changed to “Approved”. Also, assuming you entered your personal email, you should have gotten an email notification.
-
Return to the list view (top left).
Wrapping up
Congratulations, you’ve successfully created and used your very first workflow! To summarize, we have:
- Define a data model to capture user information
- Created a workflow for either approving or rejecting a user
- Added automation for automatically sending an email
- Added a new user to our workflow
- Approved a user, which triggered an email being sent.
In doing so, you’ve touched on many on the core ideas behind Flowdash and ready to build and collaborate on more complicated workflows.