Actions (Webhooks)
While the Task API makes it easy to get data into Flowdash, Actions make it easy to get data out of Flowdash and back into your application via a RESTful API. All you need to do is specify a URL to call and any relevant headers, and Flowdash will call your API every time a user performs the specified action.
Creating a new action
-
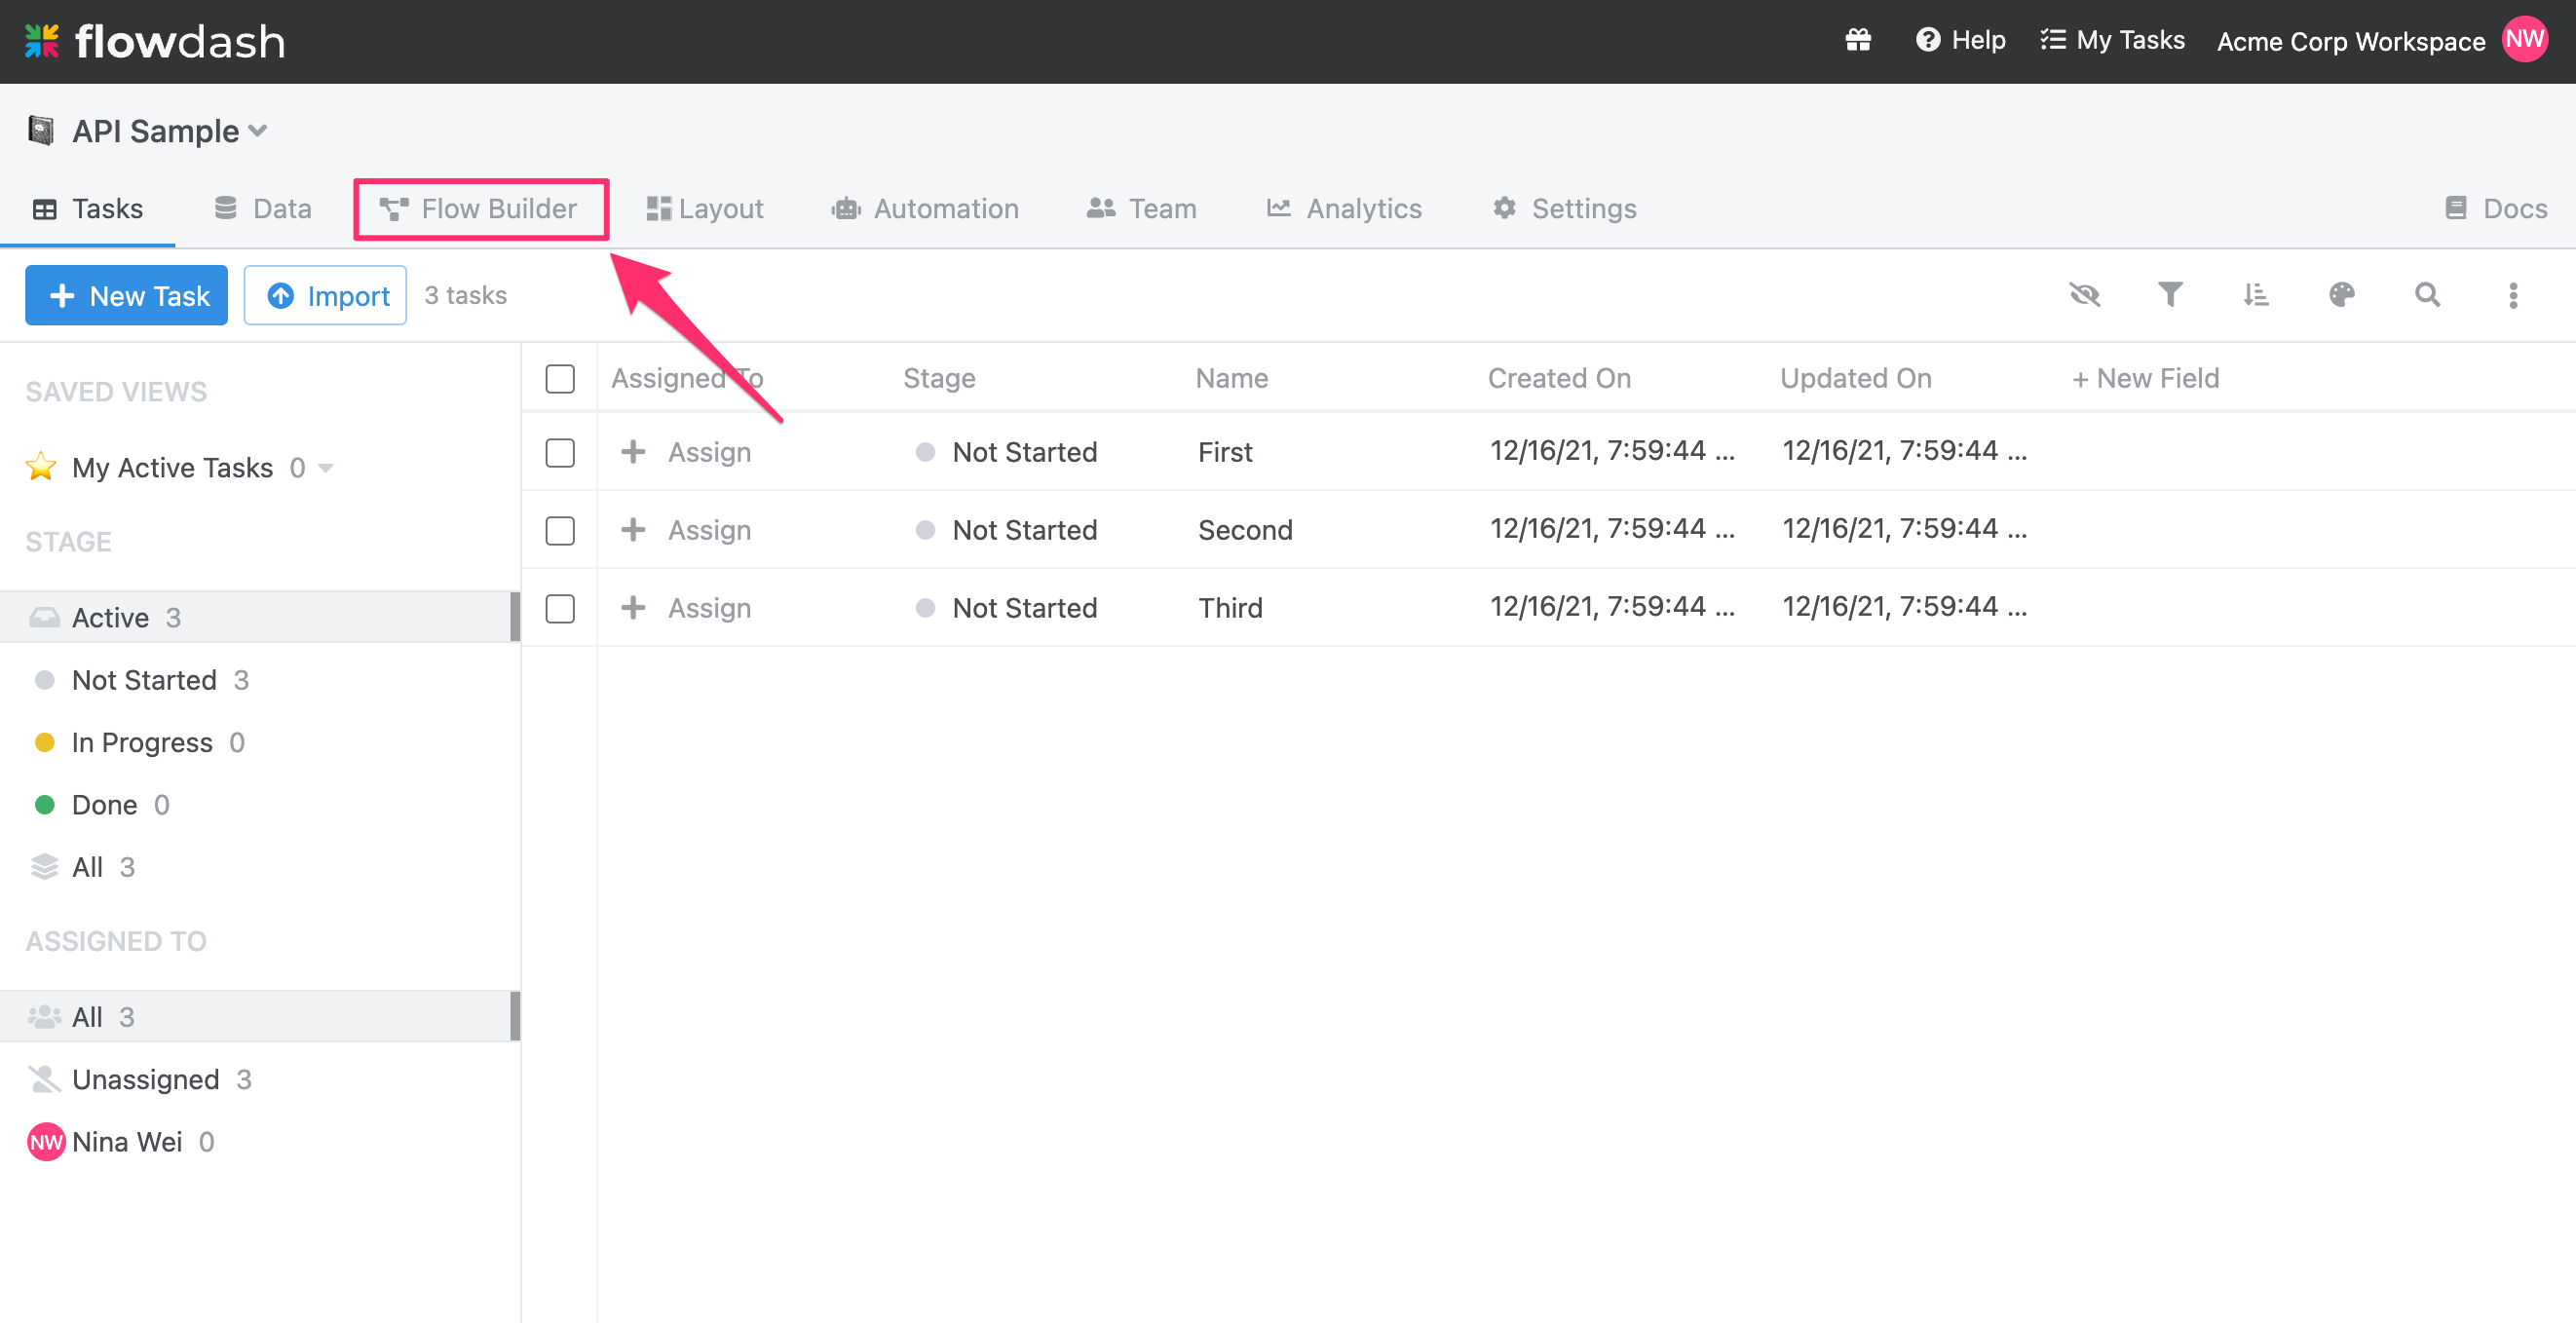
First, open the Flow Builder:
-
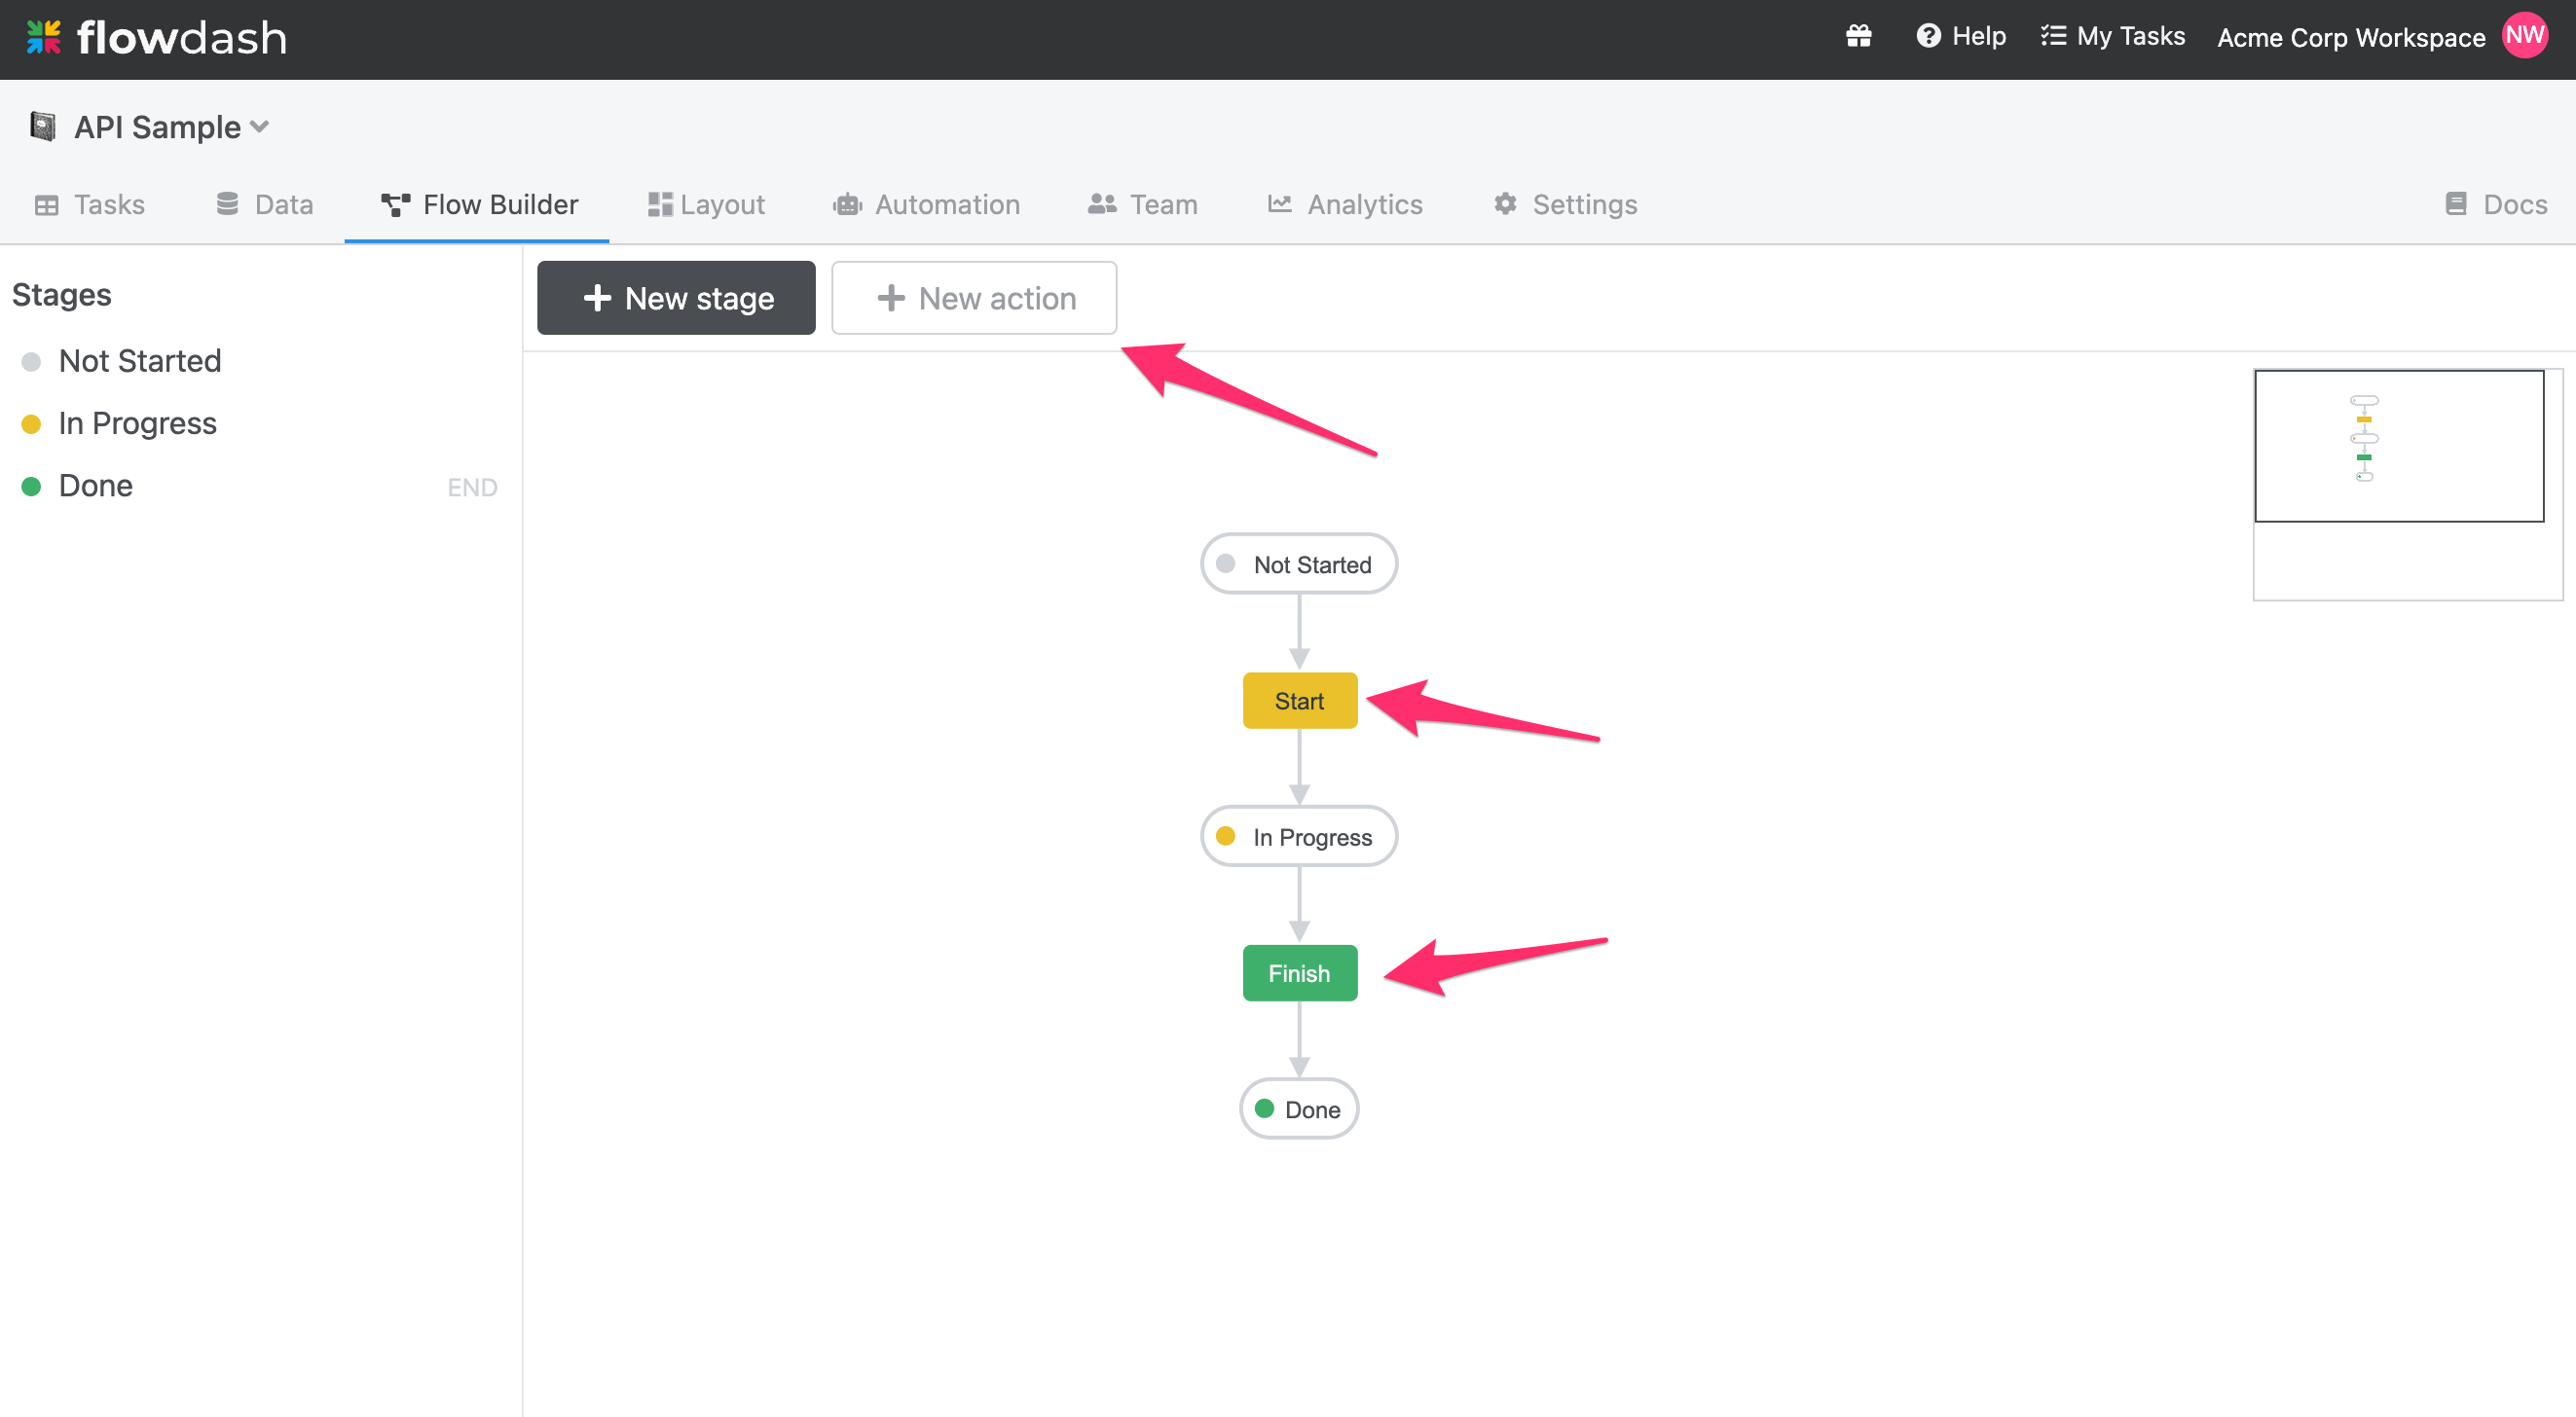
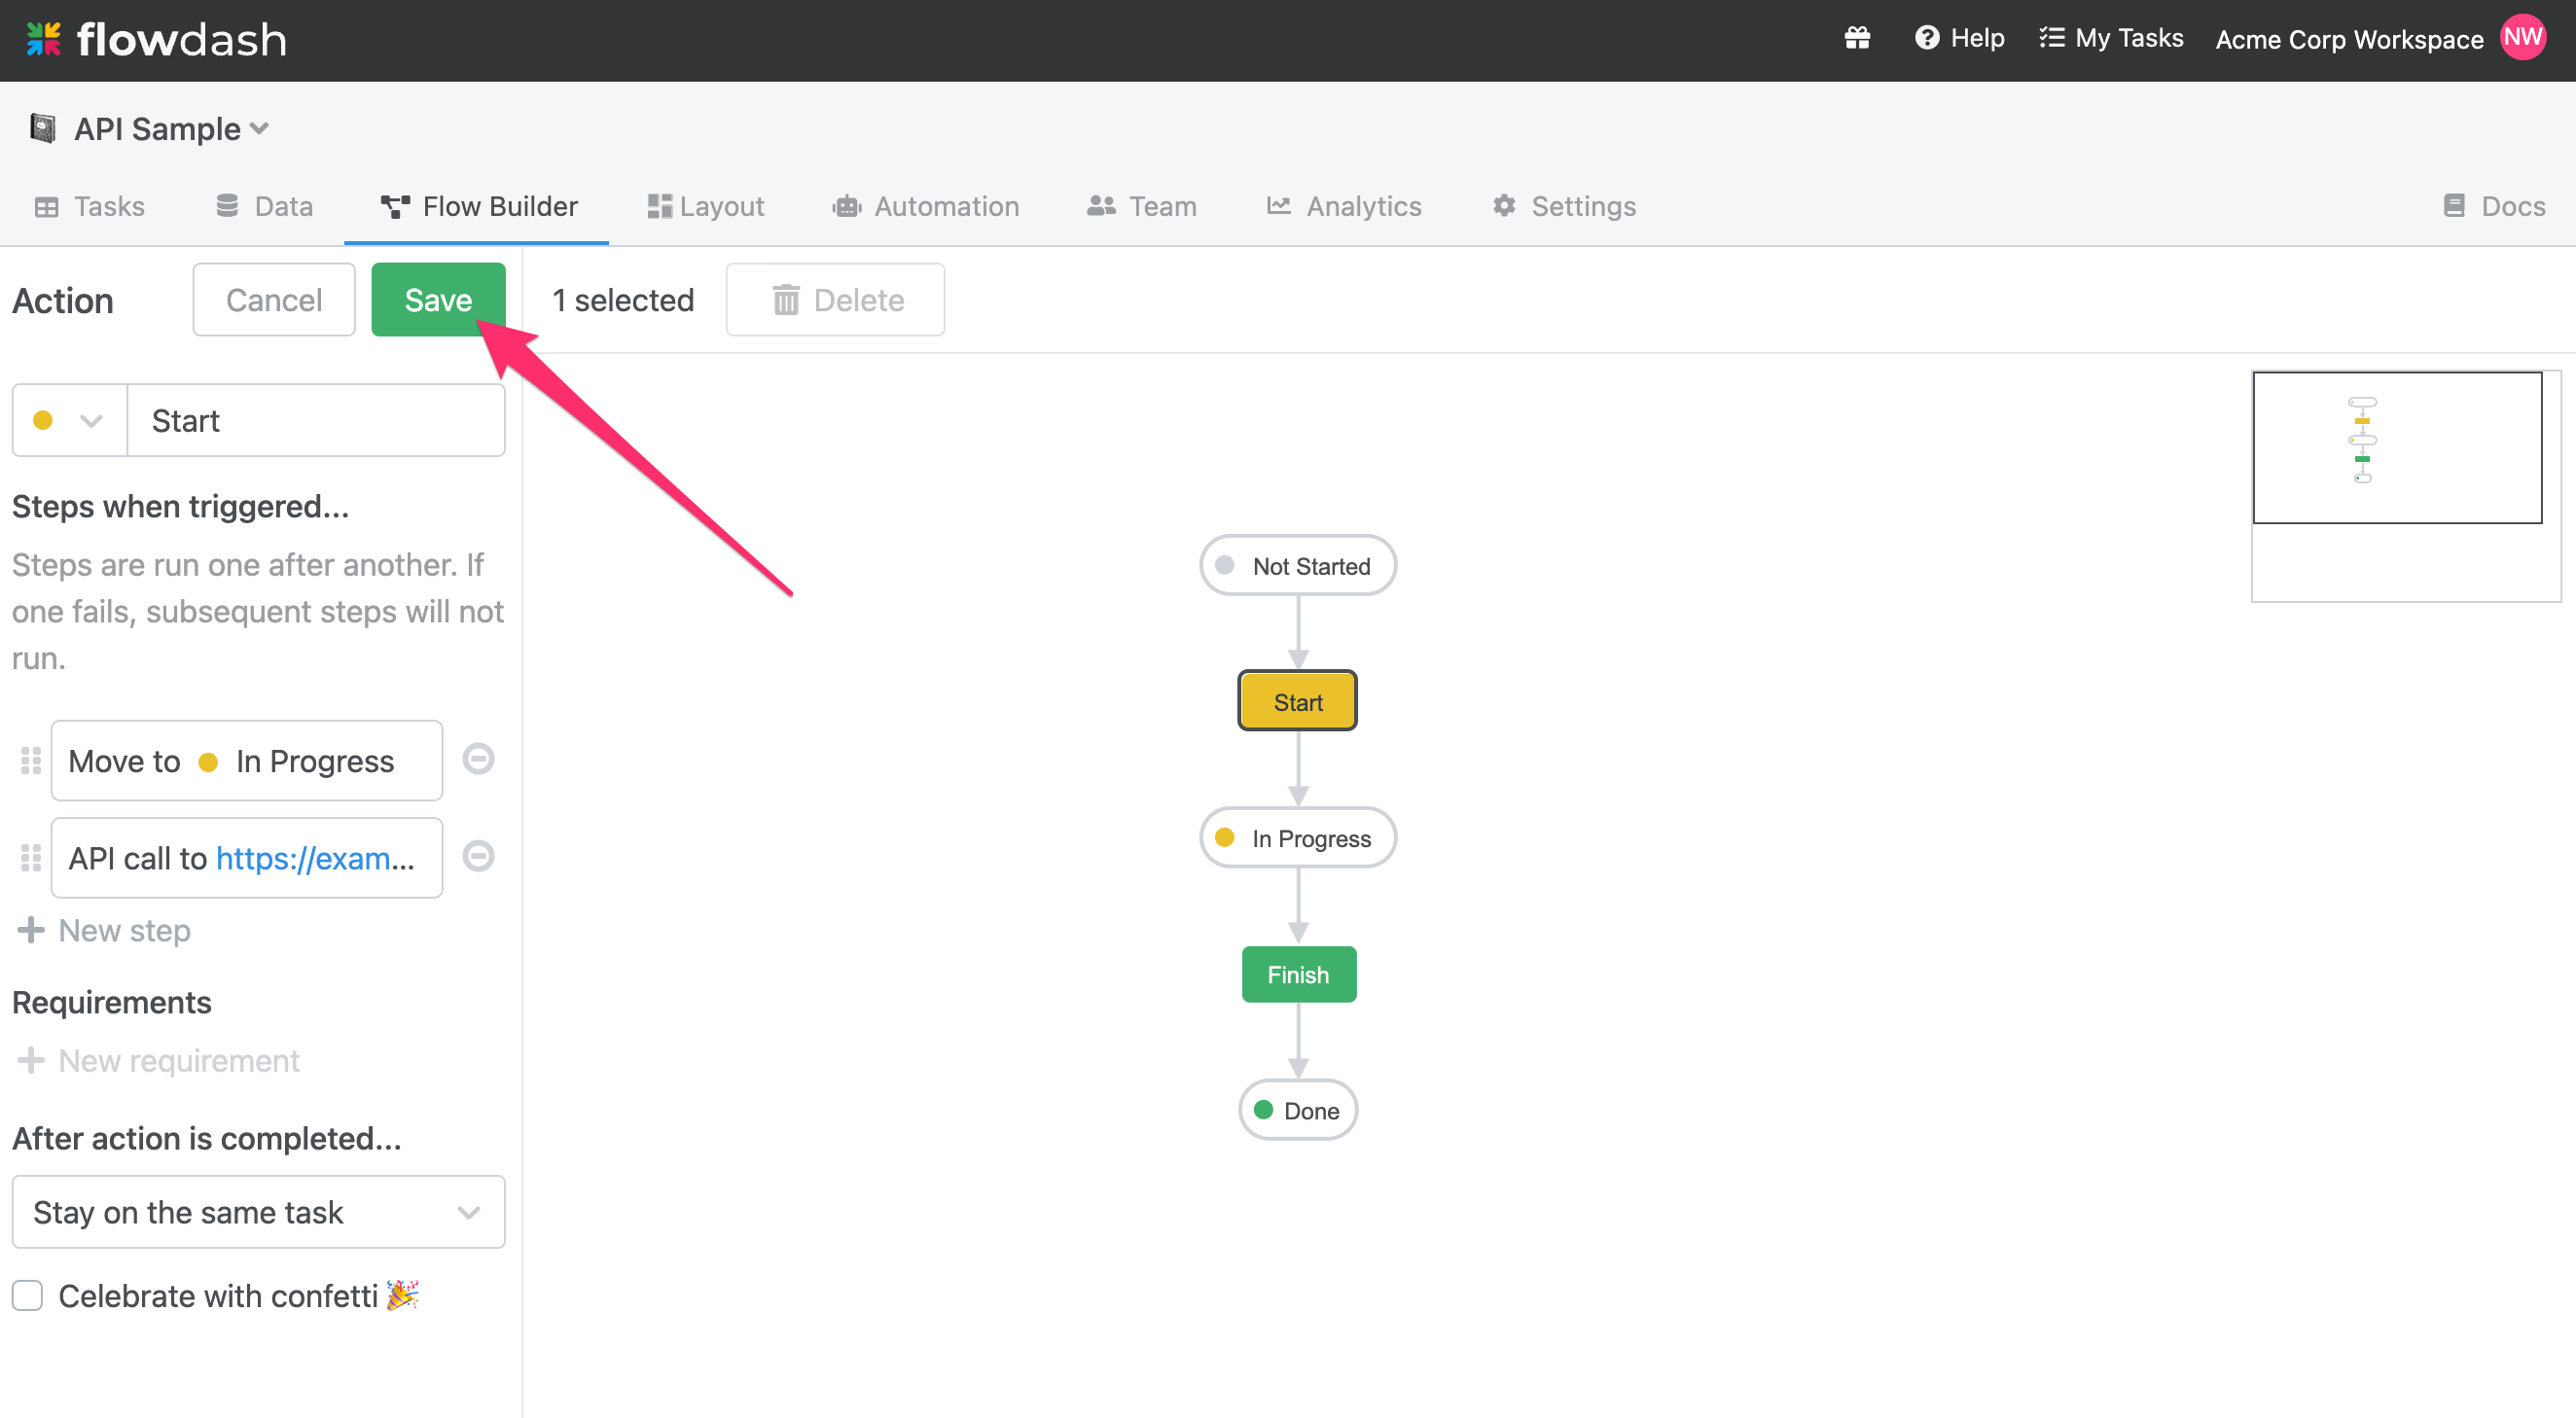
Next, create a new action, or select an existing action from the canvas. In the screenshot below, Start and ** Finish** are existing actions:
-
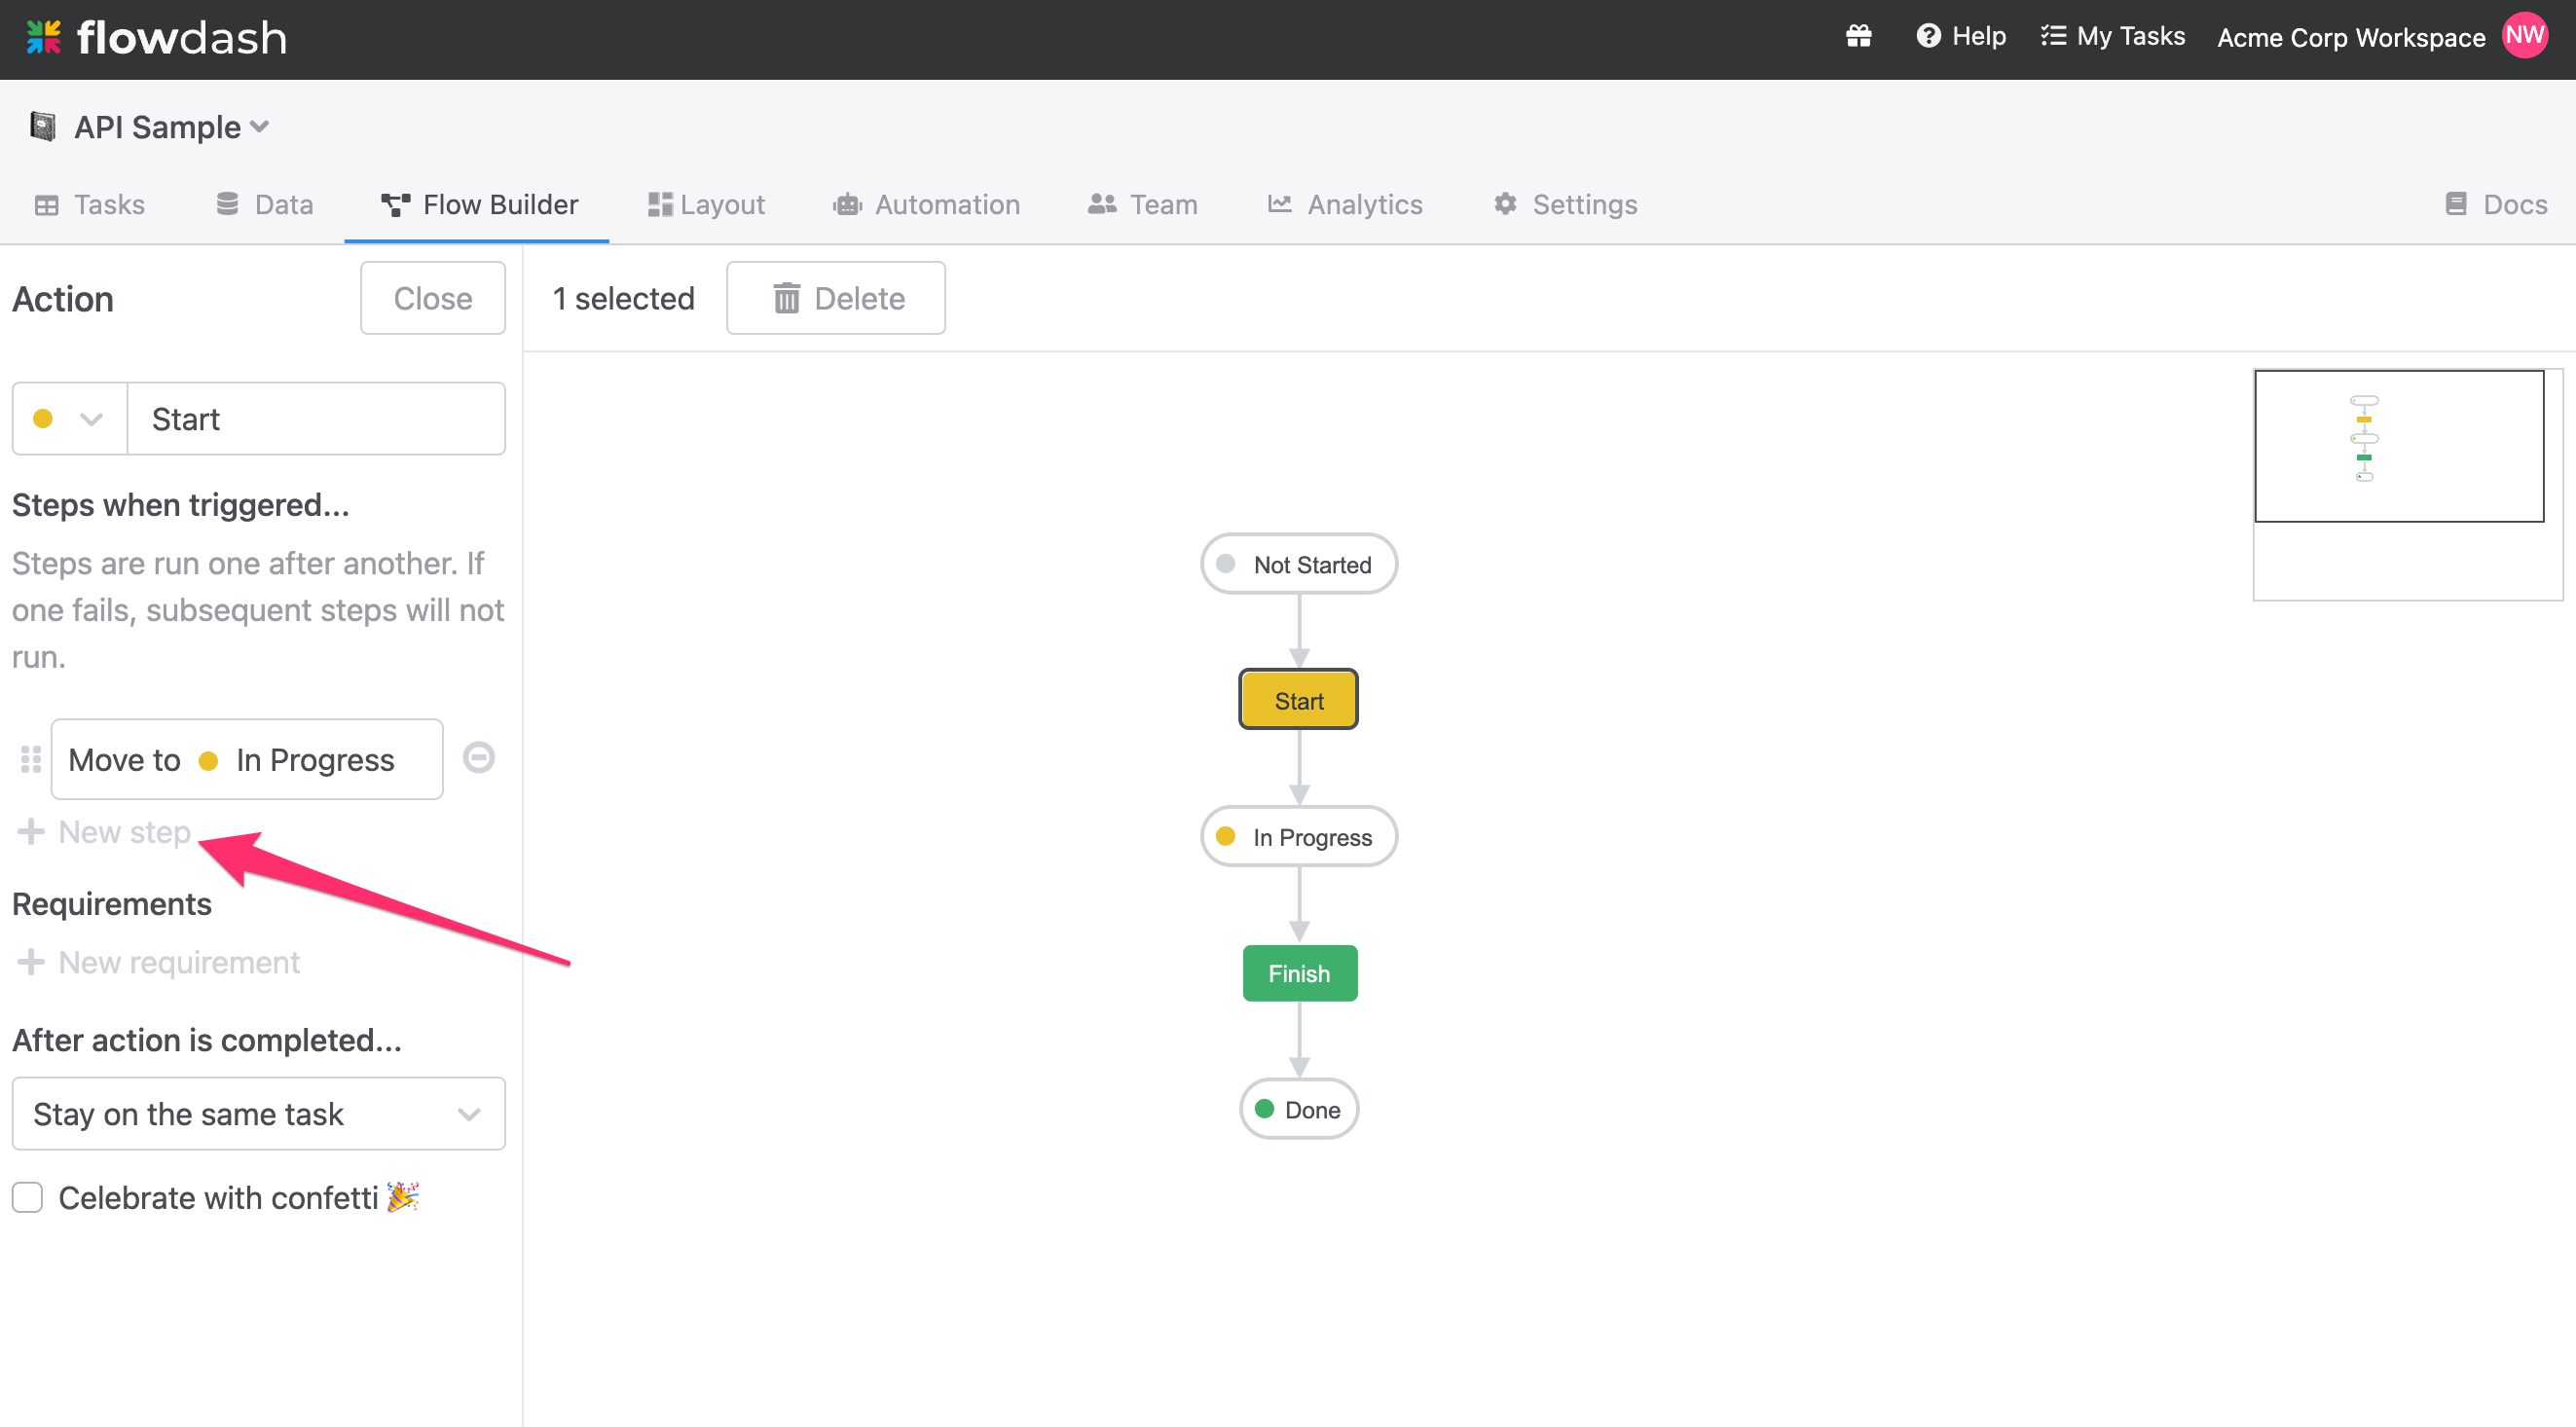
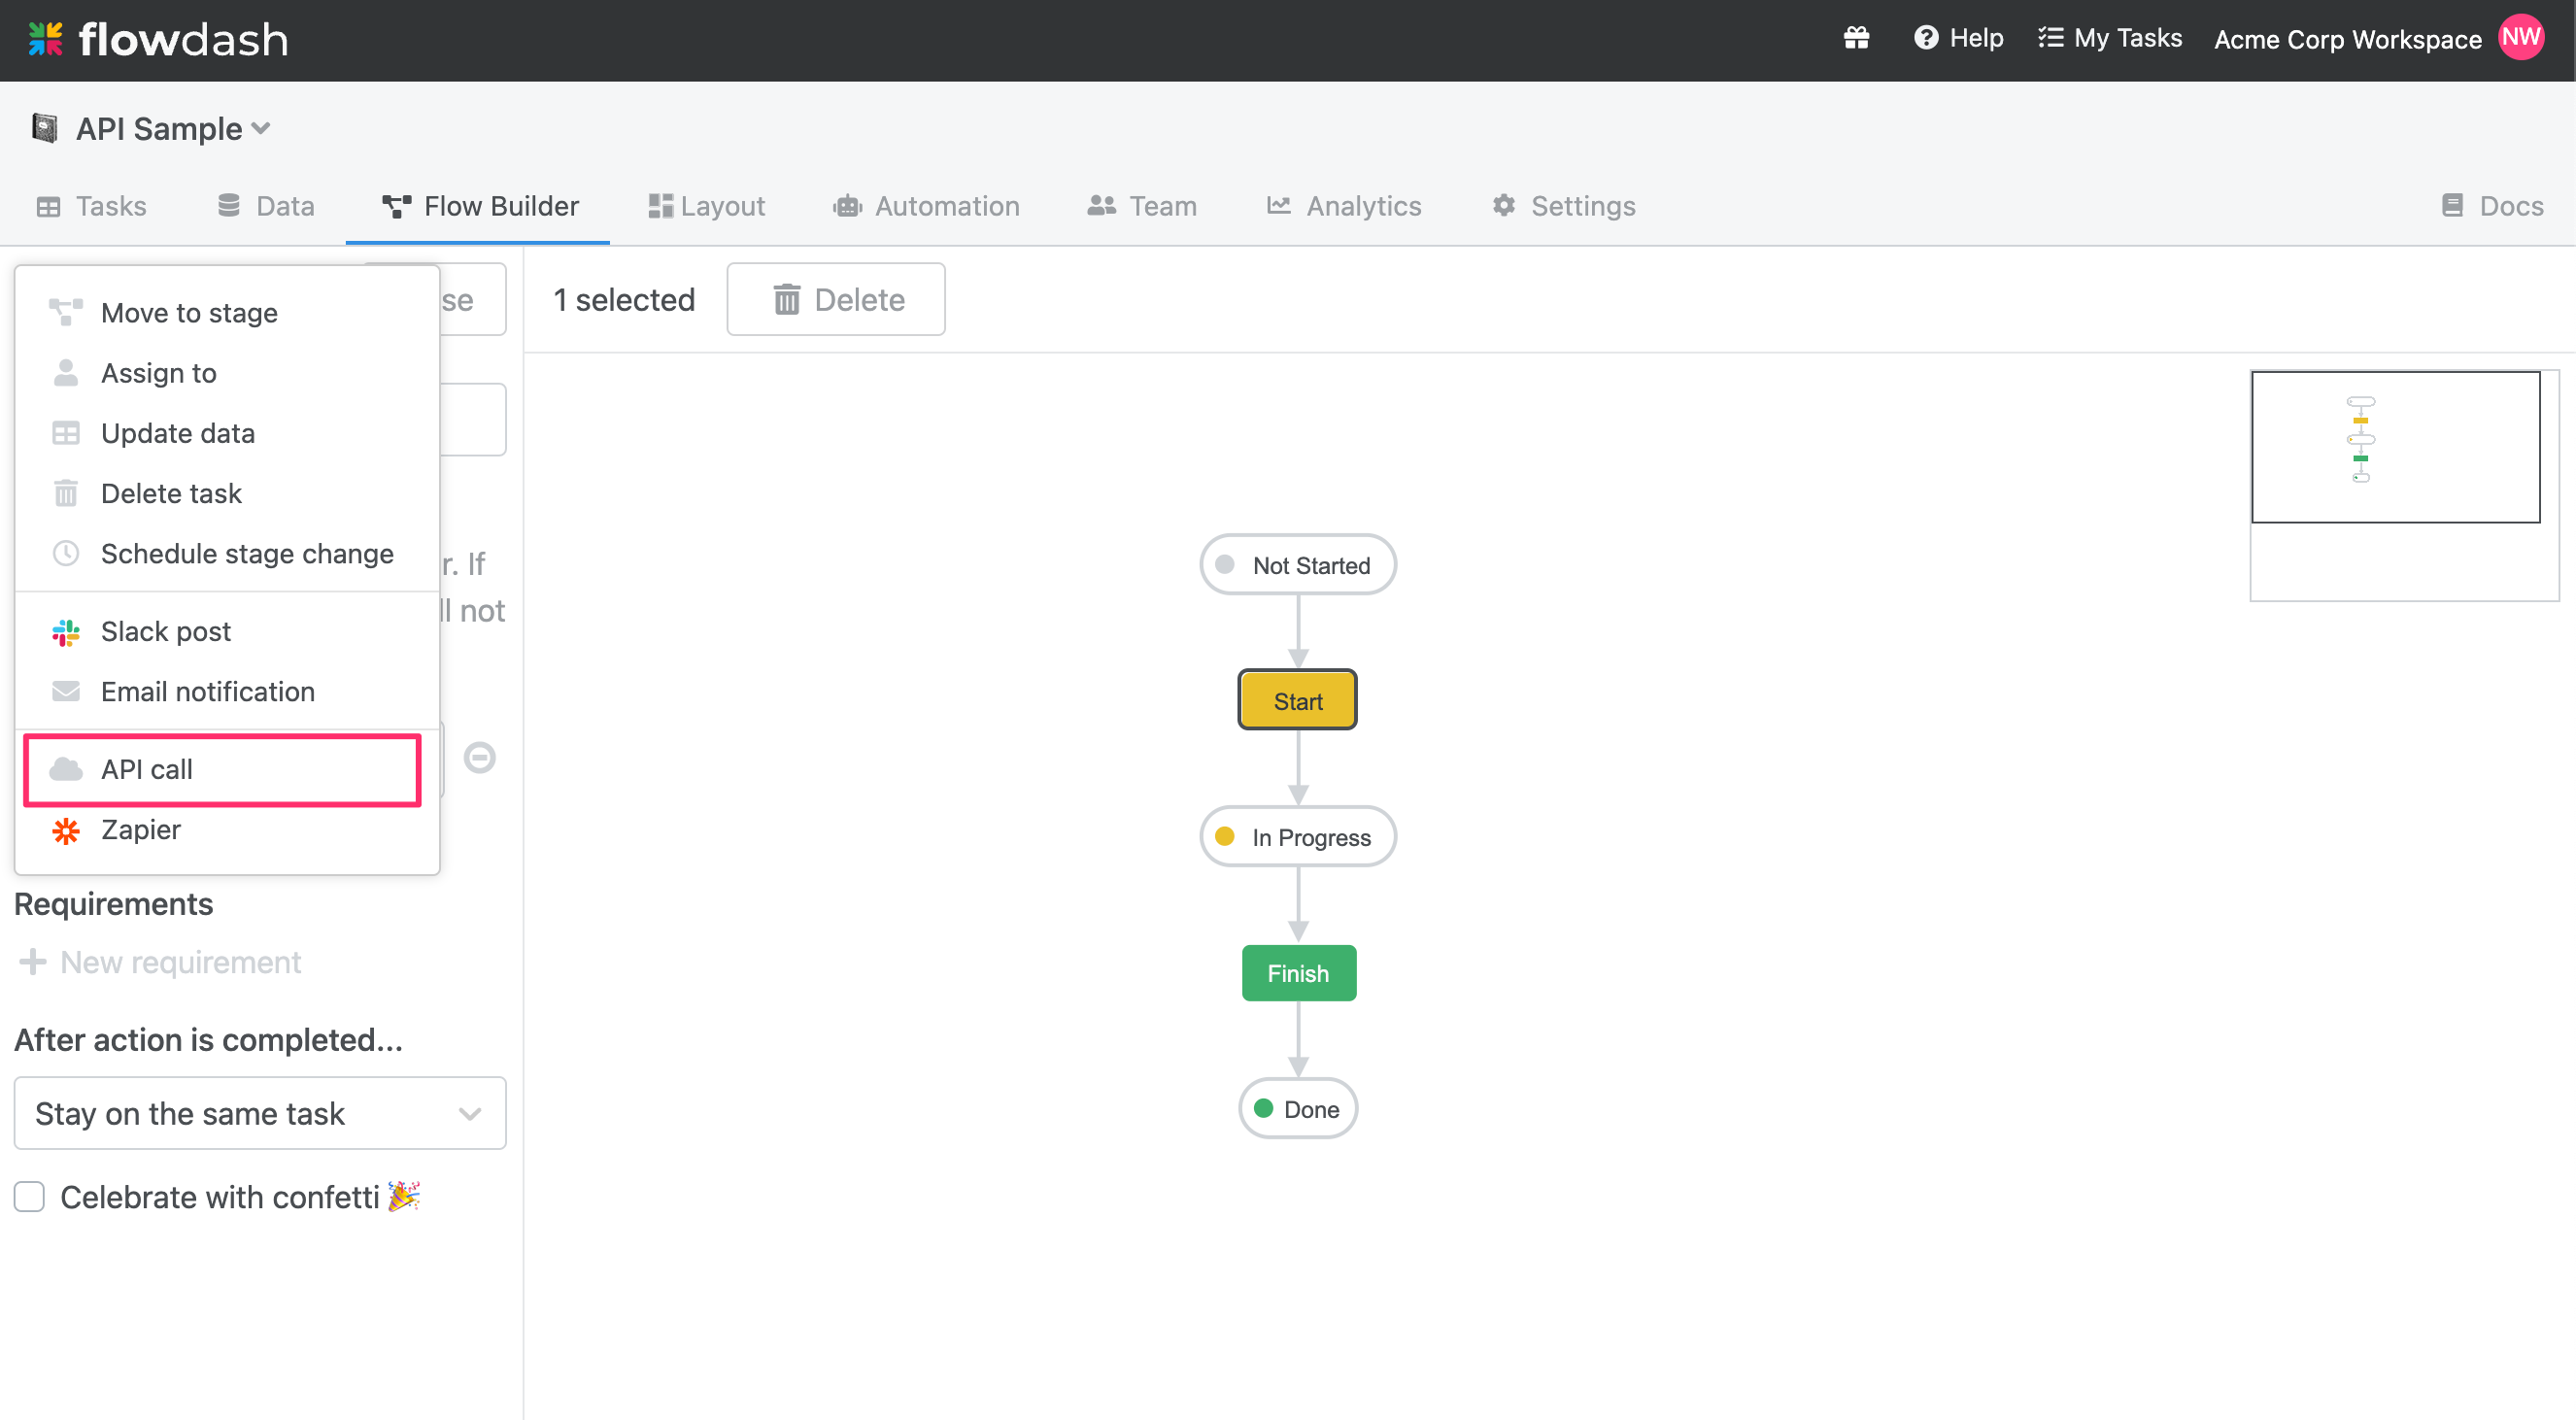
In the left sidebar, click the + New Step button and select API Call from the dropdown:
-
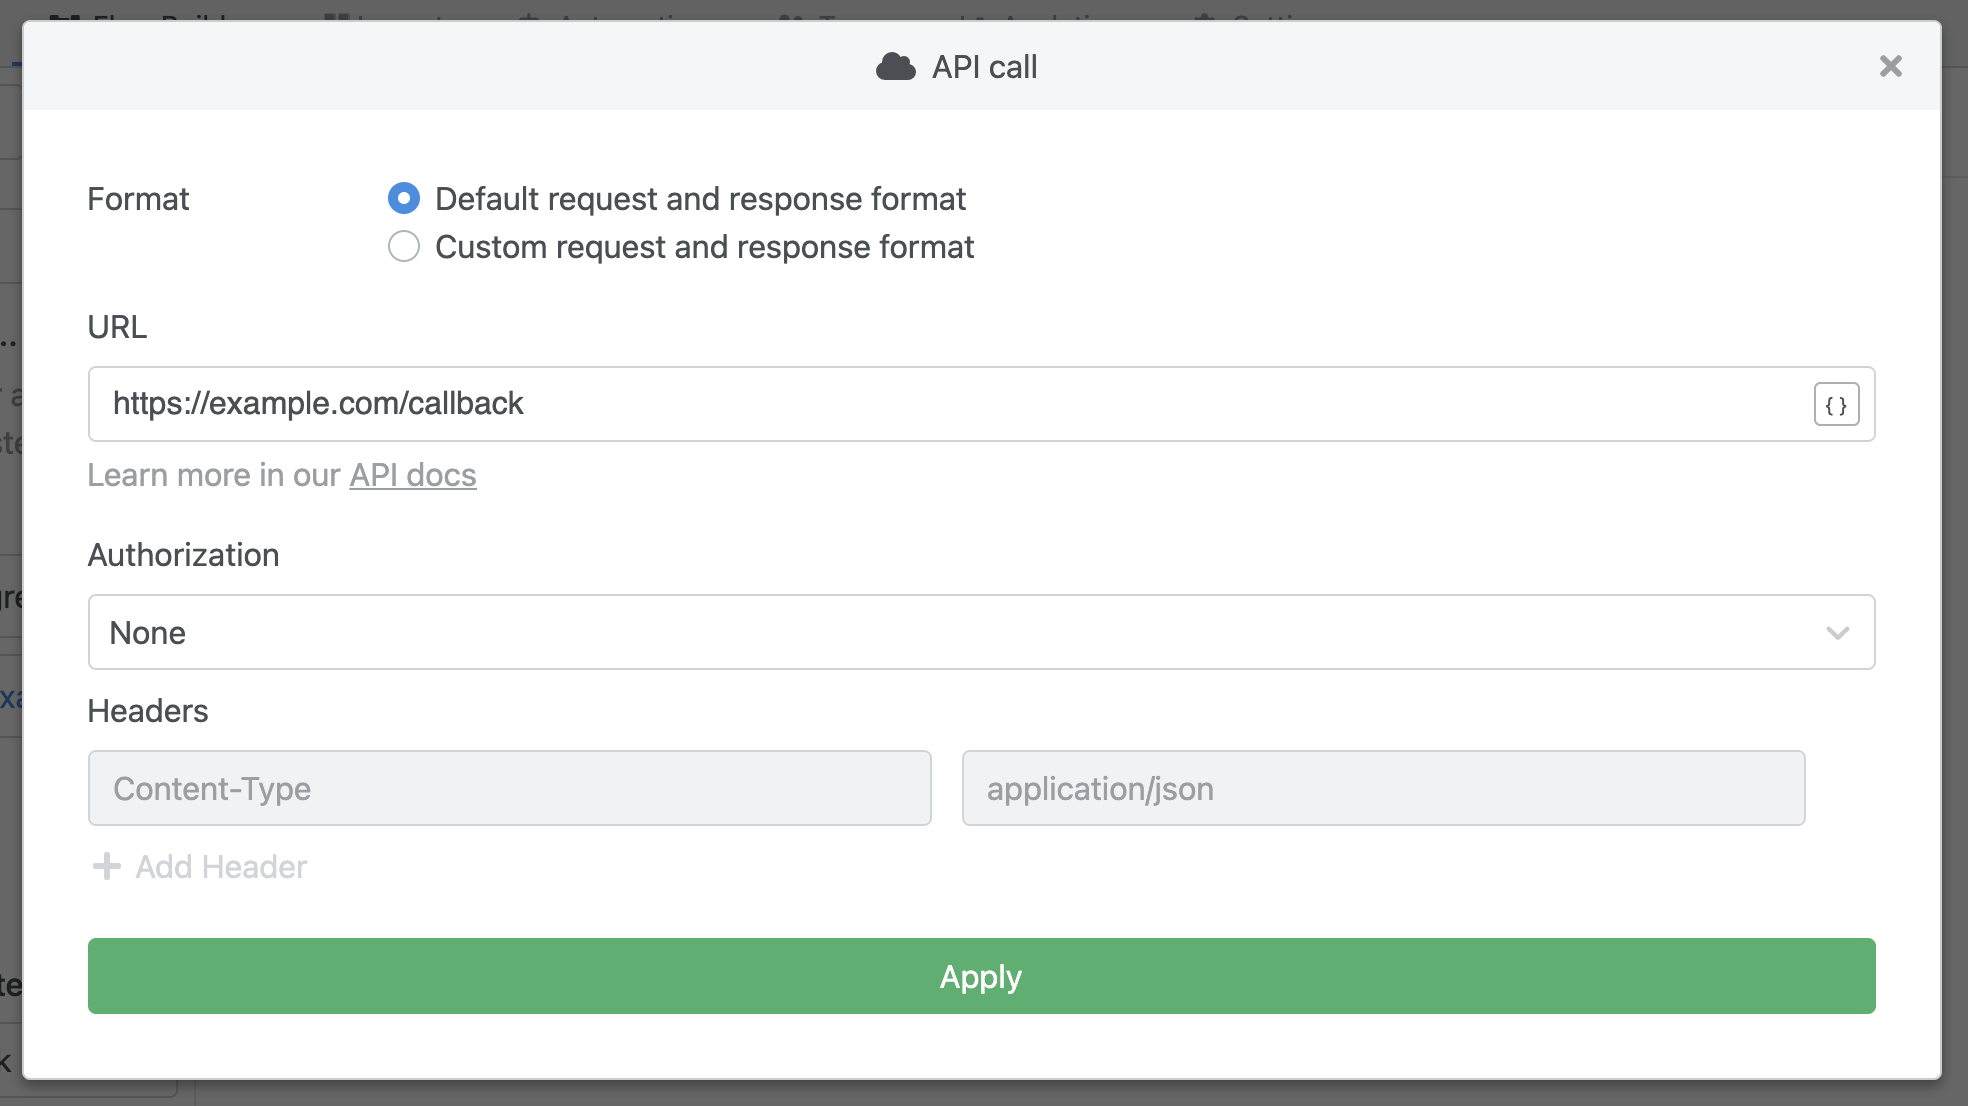
In the modal that opens, you can specify the URL of your API endpoint as well as any additional headers (for example, authorization headers):
-
Once you’re done, click Apply, then click Save in the left sidebar to commit your changes.
Request Payload
When the specified action is performed, Flowdash will call your application at the URL provided and the request body will include the name of the action, the user who performed the action, as well as a JSON representation of the task. Following the example from above, the request body would look like:
{
  "action": "Finish",
  "user": {
    "id": "abc123",
    "email": "user@example.com",
    "first_name": "Example",
    "last_name": "User"
  },
  "task": {
    "Stage": "Completed",
    "Assigned To": "user@example.com",
    "Company ID": "42",
    "Company Name": "Acme Corp",
    "Number of Employees": "20",
    "Contract Value": "10000",
    "International?": false,
    "Expected Close Date": "2020-01-31"
  }
}
Response Format
If your application responds with a 2xx code, Flowdash will interpret the API call as successful and move on to the next step in the action. If your application responds with a non-2xx code, Flowdash will abort the action on the current step and alert the user that an error has occurred.
In addition to being able to indicate success/failure, you can also modify the task in your response in the success case. For example, if we wanted to update the Expected Close Date, you could include the following in the response payload.
{
  "task": {
    "Expected Close Date": "2020-02-01"
  }
}