Linking Multiple Workflows
You can link multiple workflows together to better organize your data. Linked workflows allow you to:
- Define relationships between tables. For example, tying multiple Contacts to a single Account.
- Link disjoint processes across different teams without requiring access to both workflows.
- Automatically create tasks in a workflow in response to events in another workflow.
Linking one workflow to another
Let’s say we have two workflows, Accounts and Contacts, and we’d like to define a relationship between these workflows such that every account can be tied to multiple contacts. To start, we’ll open the Accounts workflow, but this can also be initiated from the Contacts workflow.
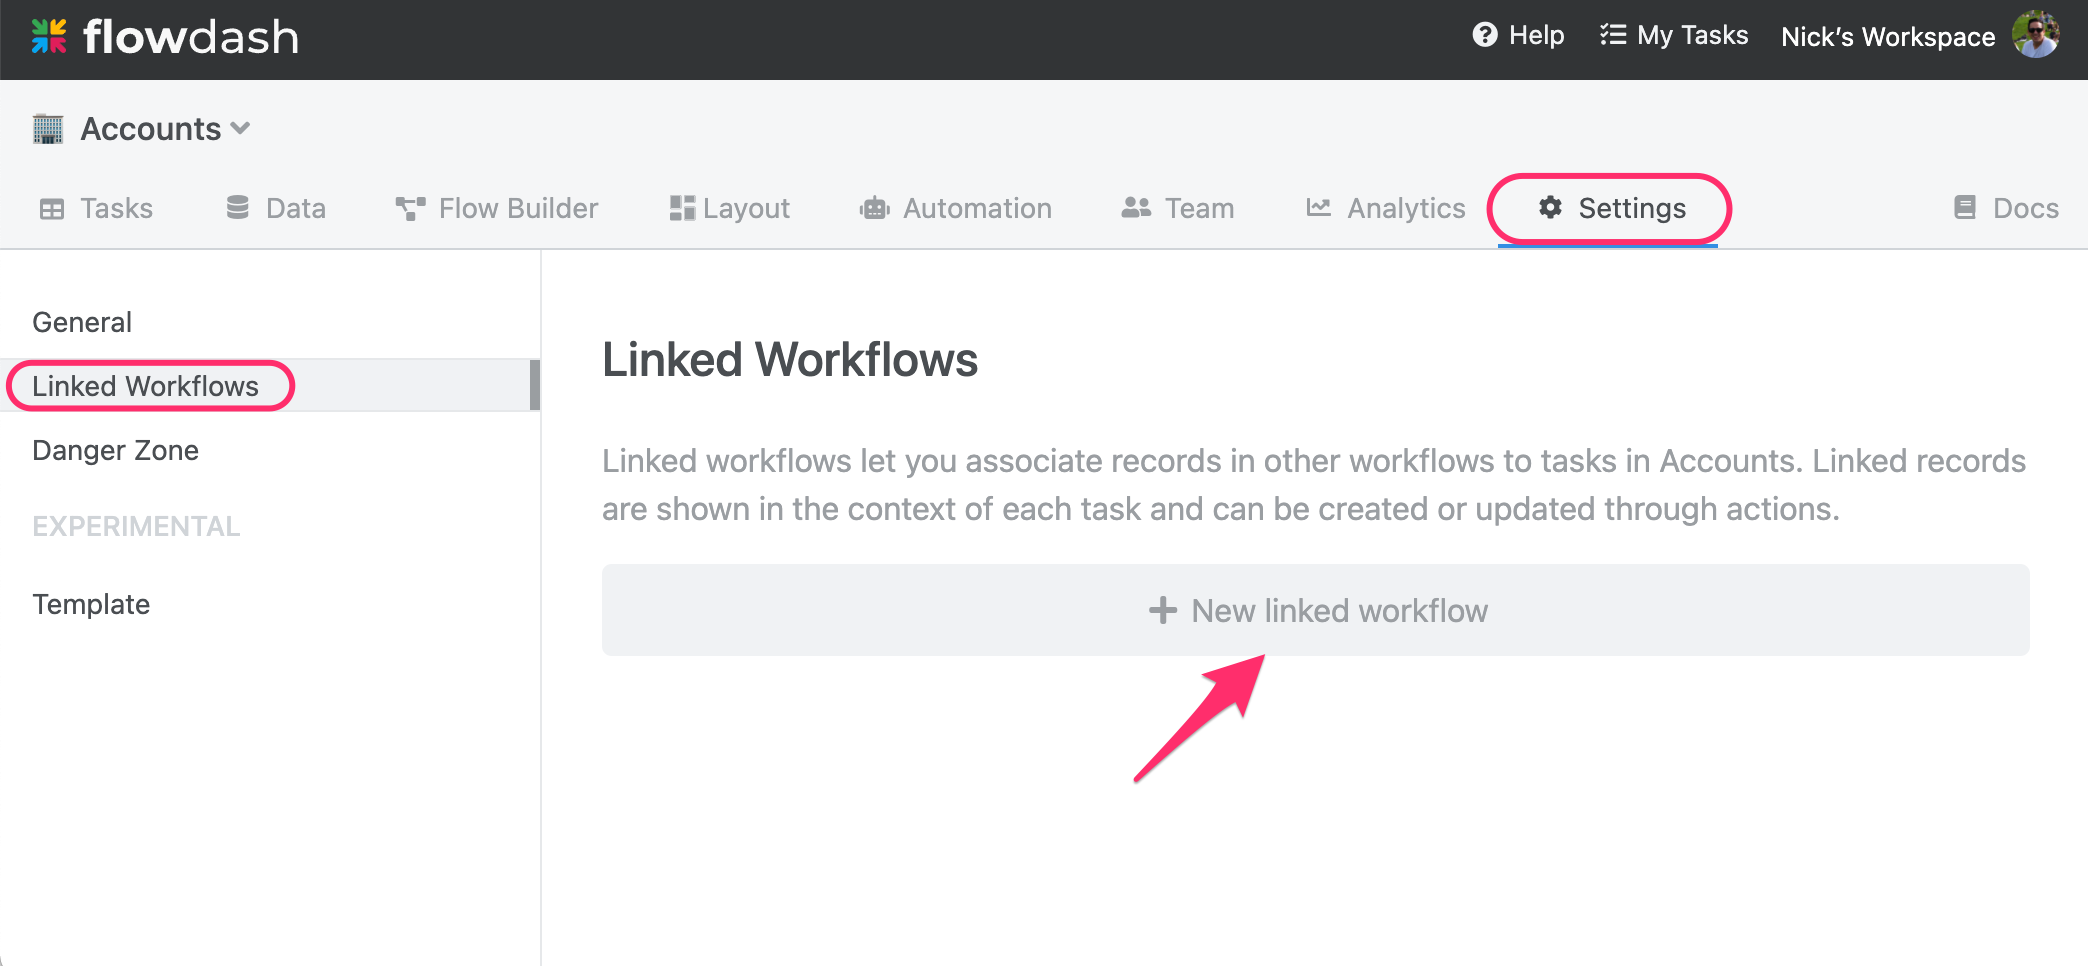
Workflow links can be created be found under the Settings tab under the Linked Workflow section. Click the “New linked workflow” button to get started:
This will open the following modal to configure the relationship:
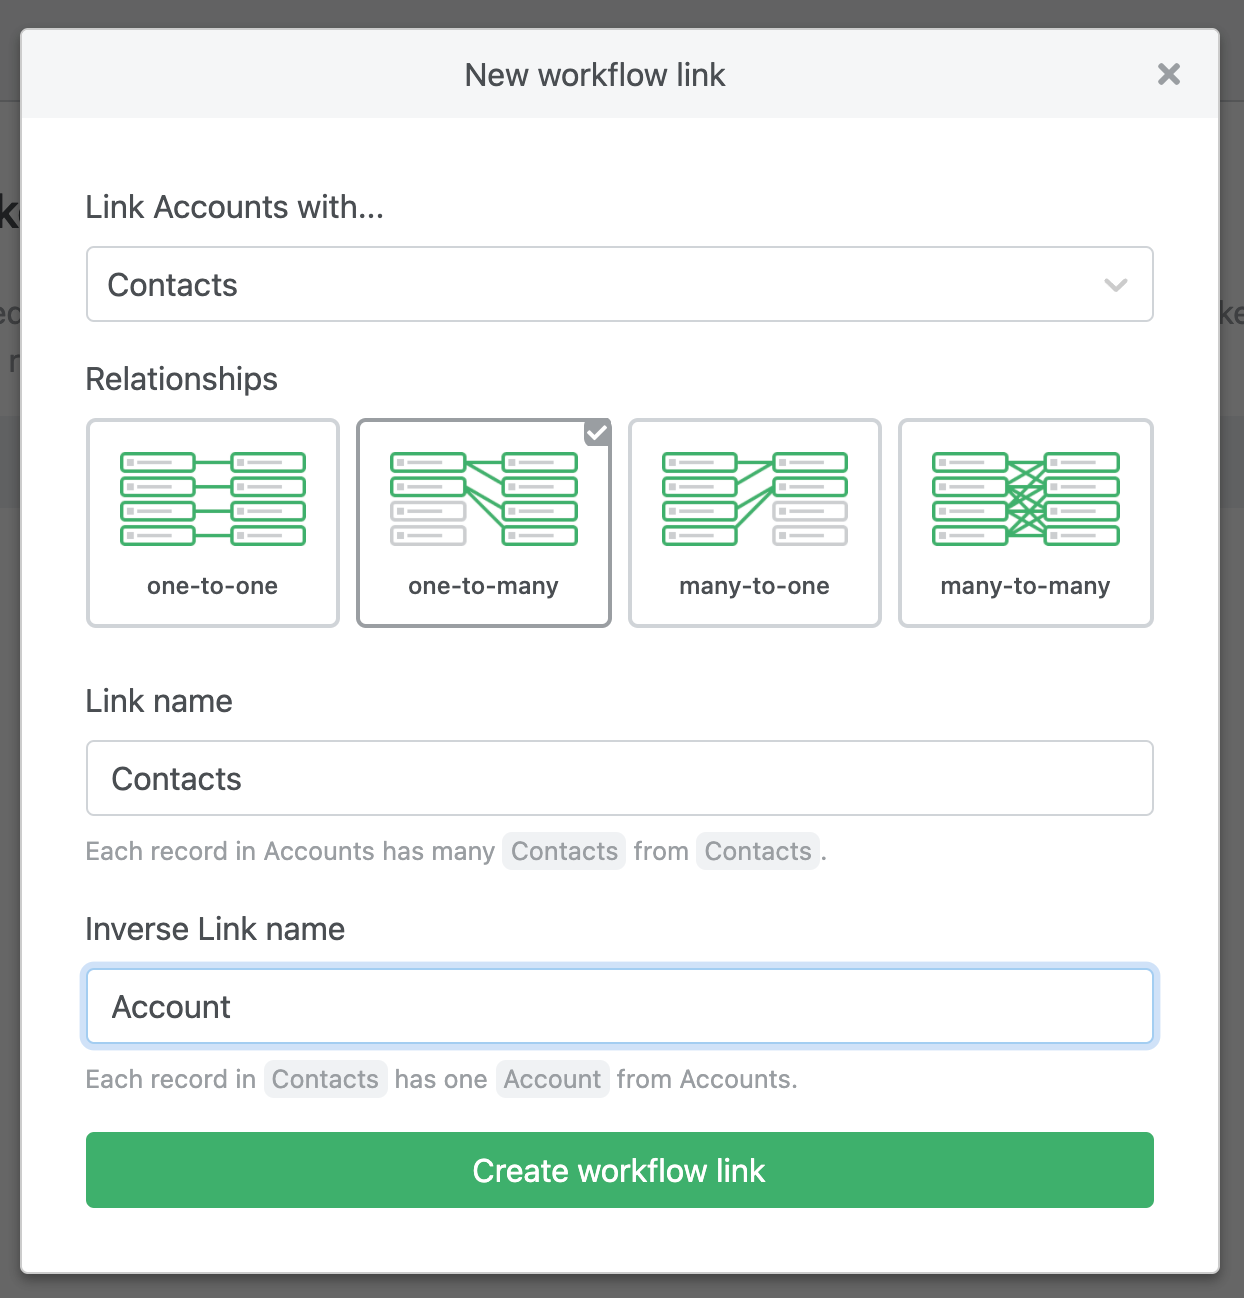
The first dropdown allows you to select which workflow to link. In our case, we’ve selected the Contacts workflow.
Relationships - Flowdash supports one-to-one, one-to-many, and many-to-many style relationships. For our example, we’ve selected a one-to-many relationship since an Account has many Contacts. Note that if we had started from the Contacts.
Link Name - This is the name that will appear in the Accounts table, each Account detail page, and the API representing the relationship to the Contacts table. Since it will appear alongside other fields, this name cannot collide with any of your field names.
Inverse Link Name - This is similar to Link Name, but on the inverse direction. This name refers to the Account from the Contacts table, so it cannot collide with any of the field names on Contacts.
Linking records
Now that the relationship has been defined, let’s trying connecting an account to a contact. First, we’ll open the details page for an account. The page will now include a new block to display the account’s linked contacts:
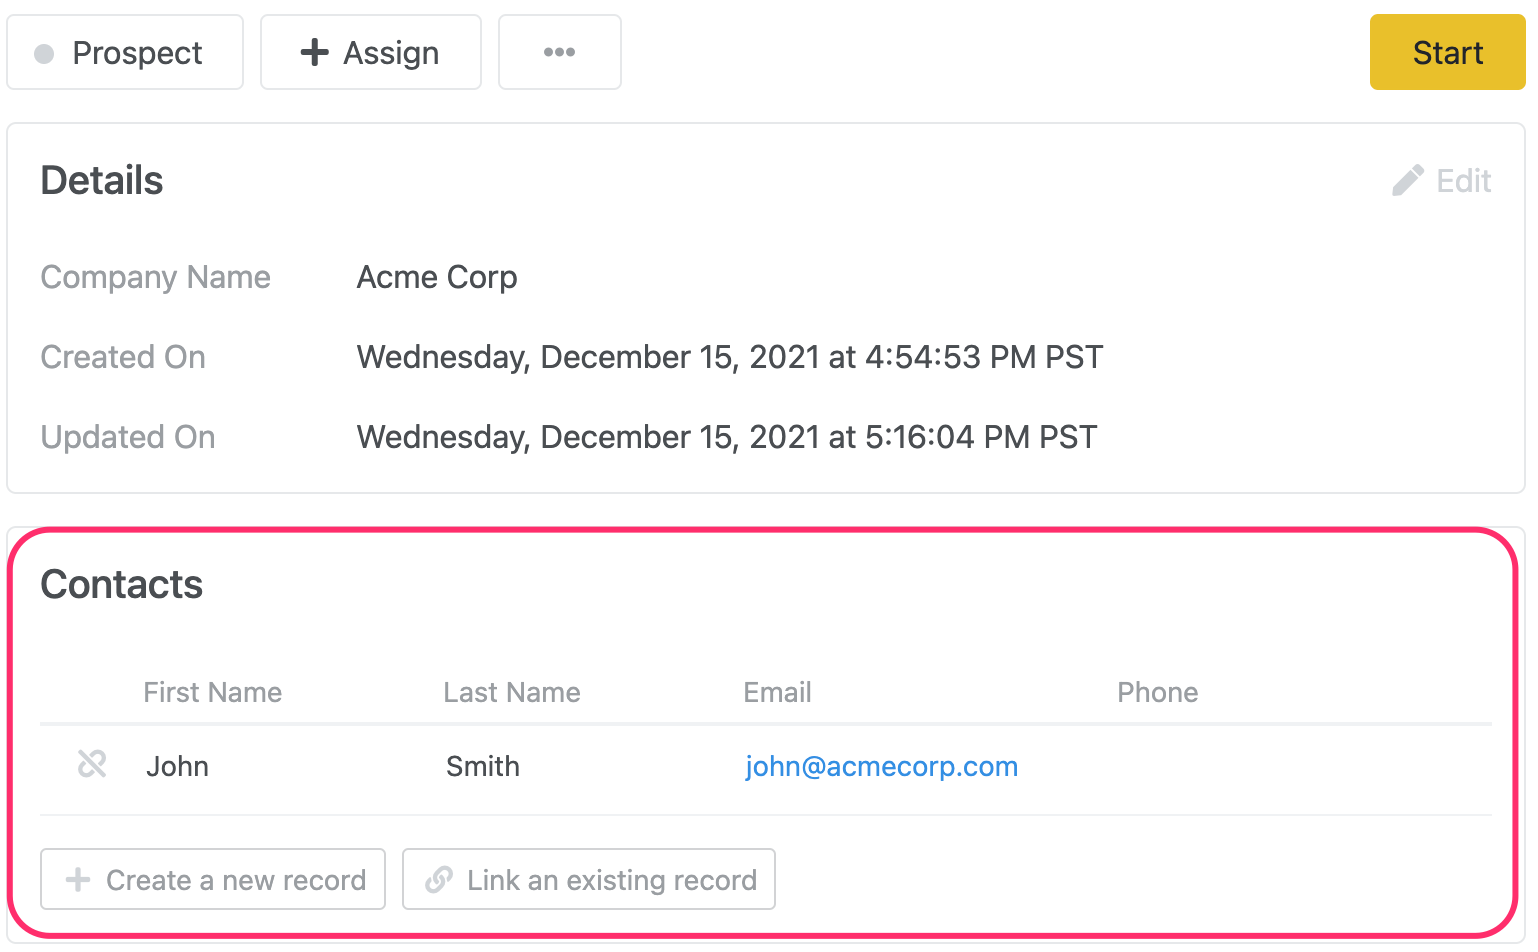
If you don’t like the default placement of the block or would like to configure how it is displayed, you can customize the layout. From this block you can:
- Create a new contact linked to this account
- Link existing contacts to this account
- Unlink the contact from this account
- Click the row to navigate to the details page of the contact
- Edit any of the contact’s fields
Linked workflows and permissions
The linked tasks block will not be visible if the current user does not have read access to the linked workflow. This can be helpful to separate visibility across different teams while preserving the relationship.
If we click one of the rows in the contacts table it will open the details page for that contact. This page will also include a new block to represent the linked account. Since the contacts-to-accounts relationship is many-to-one, it displays as a details block instead of a table:
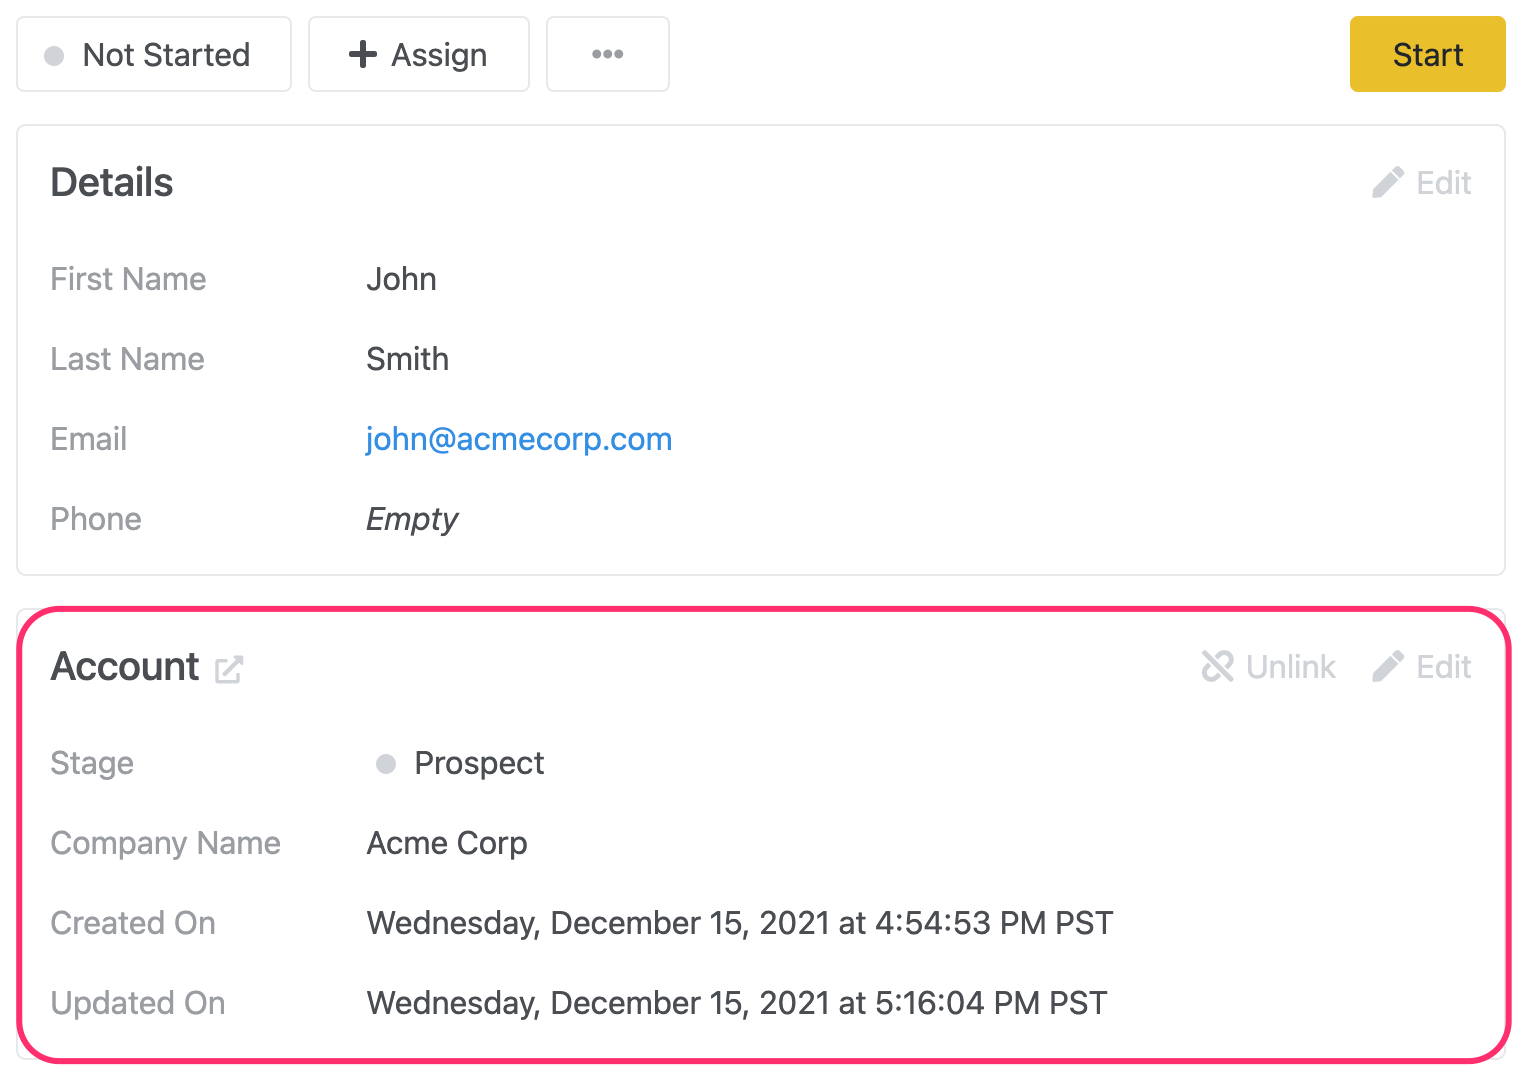
From here, you can:
- Open the details page of the linked account
- Edit any of the fields of the account
- Unlink the account
Using linked tasks in actions and automations
Linked tasks can also be used in Actions and Automations. Namely, you can:
- Create a new linked task, and
- Update existing linked tasks
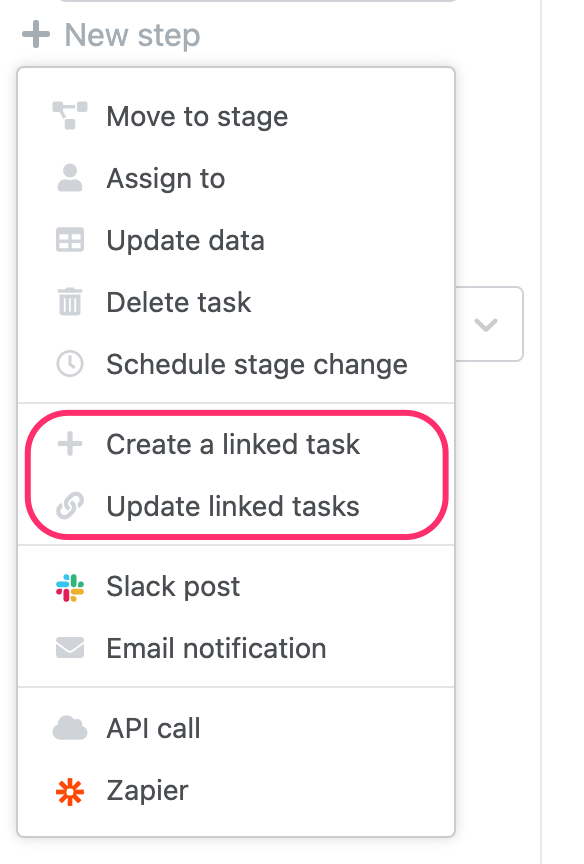
I’m not seeing the Create a linked task and Update linked tasks steps
These steps will only appear after you’ve set up a linked workflow.
API
You can also read linked tasks, link existing tasks, or unlink tasks programmatically via our API.